Official National Archives KIA list
Last Name Given Names Social Security or Date of Birth Service Rank Grade and Service Occupation Actual Date of Casualty Actual Date of Death Tour Date Posthumous Casualty Type Reason Air no Air Body Recovered Date Body Recovered Country Province Casualty Location Major command, Company/battery/troop Battalion or Home of Record City Home of Record State Panel Line
Service Number posthumous promotion Decoration eg division or brigade or similar level unit similar level unit
ADAMS JOHN TERRY 2033889 1/23/1944 Marine Corps Lance Corporal E3 Rifleman (USMC) 6/16/1966 6/16/1966 Invalid Date Navy Cross Hostile, Died Gun, Small Arms Fire Ground Casualty Undefined Code Invalid Date South Vietnam Quang Tin Howard's Hill, Hill 55 Nui Vu Hill Mass S of Hiep Duc 1st Mar Div C Co 1st Recon Bn COVINGTON Oklahoma 08E 50
ADCOX RONNIE DARNELL 2223448 2/21/1944 Marine Corps Lance Corporal E3 Rifleman (USMC) 3/3/1967 3/3/1967 Invalid Date Hostile, Died Misadventure Ground Casualty Undefined Code Invalid Date South Vietnam Quang Nam 1st Mar Div C Co 1st Recon Bn HENDERSON North Carolina 16E 6
ALEWINE LEMUEL LENOEL 1115870 12/25/1932 Marine Corps Gunnery Sergeant E7 Infantry Unit Leader (USMC) 10/17/1967 10/17/1967 9/4/1967 Hostile, Died Gun, Small Arms Fire Ground Casualty Undefined Code Invalid Date South Vietnam Quang Nam 1st Mar Div A Co 1st Recon Bn THORNTON Texas 28E 18
ALLEN ANTHONY 2174806 7/27/1946 Marine Corps Corporal E4 Rifleman (USMC) 7/11/1967 7/11/1967 Invalid Date Non-Hostile, Died of Other Causes Other Causes Ground Casualty Undefined Code Invalid Date South Vietnam Quang Nam 1st Mar Div 1st Force Recon Co 1st Recon Bn PHILADELPHIA Pennsylvania 23E 48
ANDERSON RONALD CARLIS 2345444 9/21/1946 Marine Corps Private First Class E2 Rifleman (USMC) 5/4/1968 5/4/1968 3/26/1968 Hostile, Died Gun, Small Arms Fire Ground Casualty Undefined Code Invalid Date South Vietnam Quang Nam 1st Mar Div E Co 1st Recon Bn COLUMBUS Georgia 54E 30
ANGERMILLER JAMES ALLEN 2227938 5/29/1947 Marine Corps Private First Class E2 Rifleman (USMC) 2/6/1967 2/6/1967 Invalid Date Hostile, Died Other Explosive Device Ground Casualty Undefined Code Invalid Date South Vietnam Quang Tin 1st Mar Div C Co 1st Recon Bn CORPUS CHRISTI Texas 14E 125
ARMITAGE ROBERT LAYMON 2314872 8/23/1947 Marine Corps Private First Class E2 Rifleman (USMC) 2/4/1967 Invalid Date Hostile, Died of Wounds Other Explosive Device Ground Casualty Undefined Code Invalid Date South Vietnam Quang Ngai 1st Mar Div A Co 1st Recon Bn EVERETT Washington 14E 115
ATKINS DOYLE 2140446 10/27/1945 Marine Corps Staff Sergeant #REF! Rifleman (USMC) 1/16/1969 1/16/1969 1/9/1969 Hostile, Died Gun, Small Arms Fire Ground Casualty Undefined Code Invalid Date South Vietnam Quang Nam 1st Mar Div C Co 1st Recon Bn MODESTO California 34W 13
ATKISON CHARLES LEON 496567632 10/12/1949 Marine Corps Lance Corporal E3 Undefined Code 9/21/1969 9/21/1969 4/25/1969 Hostile, Died Gun, Small Arms Fire Ground Casualty Undefined Code Invalid Date South Vietnam Quang Nam 1st Mar Div C Co 1st Recon Bn ST JOSEPH Missouri 18W 119
AYERS DARRELL EUGENE 538341301 4/4/1937 Marine Corps Staff Sergeant #REF! Assaultman (USMC) 3/19/1970 3/19/1970 Invalid Date Navy Cross Hostile, Died Gun, Small Arms Fire Ground Casualty Body Not Recovered Invalid Date South Vietnam Quang Nam 1st Mar Div 1st Recon Bn ALDERWOOD MANOR Washington 12W 19
BALDERA BARTOLOME ALFONSO 2282359 11/14/1948 Marine Corps Private E1 Rifleman (USMC) 2/21/1968 2/21/1968 12/10/1967 Non-Hostile, Died of Other Causes Other Accident Ground Casualty Undefined Code Invalid Date South Vietnam Quang Nam 1st Mar Div B Co 1st Recon Bn NEW YORK New York 40E 51
BARNES ERIC MARVIN 89806 5/4/1942 Marine Corps Captain O3 Infantry Officer (USMC) 3/25/1967 3/25/1967 Invalid Date Hostile, Died Other Explosive Device Ground Casualty Undefined Code Invalid Date South Vietnam Quang Nam 1st Mar Div 1st Recon Bn WINDSOR Connecticut 17E 41
BARNES JOE WILSON 2046226 9/3/1944 Marine Corps Sergeant E5 Assaultman (USMC) 2/25/1967 2/25/1967 Invalid Date Hostile, Died Other Explosive Device Ground Casualty Undefined Code Invalid Date South Vietnam Quang Ngai 1st Mar Div 1st Recon Bn BRUNSON South Carolina 15E 89
BARNES ROBERT CROZIER JR 102667 6/4/1944 Marine Corps Second Lieutenant O1 Basic Infantry Officer (USMC) 5/30/1968 5/30/1968 1/27/1968 Hostile, Died Gun, Small Arms Fire Ground Casualty Undefined Code Invalid Date South Vietnam Quang Nam 1st Mar Div B Co 1st Recon Bn CARMI Illinois 63W 14
BARRETT JAMES ALLEN 2137396 5/26/1945 Marine Corps Lance Corporal E3 Rifleman (USMC) 10/12/1966 Invalid Date Hostile, Died of Wounds Other Explosive Device Ground Casualty Undefined Code Invalid Date South Vietnam Quang Ngai 1st Mar Div C Co 1st Recon Bn PITTSBURGH Pennsylvania 11E 67
BARTON LANCE BRYAN 2312753 10/12/1945 Marine Corps Lance Corporal E3 Rifleman (USMC) 12/26/1967 12/26/1967 1/25/1967 Hostile, Died Gun, Small Arms Fire Ground Casualty Undefined Code Invalid Date South Vietnam Thua Thien 1st Mar Div A Co 1st Recon Bn RICHMOND Virginia 32E 61
BECK LARRY MONROE 105023 4/18/1944 Marine Corps Second Lieutenant O1 Infantry Officer (USMC) 1/23/1969 1/23/1969 8/11/1968 Hostile, Died Gun, Small Arms Fire Ground Casualty Undefined Code Invalid Date South Vietnam Quang Nam 1st Mar Div 1st Recon Bn PAOLI Oklahoma 34W 63
BECK MICHAEL JAMES 2373693 9/6/1947 Marine Corps Lance Corporal E3 Rifleman (USMC) 6/3/1968 6/3/1968 1/13/1968 Hostile, Died Other Explosive Device Ground Casualty Undefined Code Invalid Date South Vietnam Quang Nam 1st Mar Div B Co 1st Recon Bn GREELEY Colorado 61W 20
BELTRAN FRANK JOSEPH 2361853 5/11/1948 Marine Corps Corporal E4 Rifleman (USMC) 8/11/1968 8/11/1968 1/8/1968 Non-Hostile, Died of Other Causes Other Accident Ground Casualty Undefined Code Invalid Date South Vietnam Quang Nam 1st Mar Div B Co 1st Recon Bn EAST ROCHESTER New York 49W 46
BINGENHEIMER JAMES 156346736 8/19/1947 Marine Corps Sergeant E5 Rifleman (USMC) 3/15/1971 3/15/1971 3/16/1970 Hostile, Died Gun, Small Arms Fire Ground Casualty Undefined Code Invalid Date South Vietnam Quang Nam 1st Mar Div A Co 1st Recon Bn ATLANTIC CITY New Jersey 04W 48
BISHOP ROGER WAYNE 213548470 8/7/1949 Marine Corps Corporal E4 Undefined Code 9/7/1969 9/7/1969 3/10/1969 Non-Hostile, Died of Other Causes Other Causes Ground Casualty Undefined Code Invalid Date South Vietnam Quang Nam 1st Mar Div E Co 1st Recon Bn BELTSVILLE Maryland 18W 53
BLAND GARY PAUL 2051389 8/18/1945 Marine Corps Lance Corporal E3 Field Radio Operator (USMC) 9/22/1965 9/22/1965 Invalid Date Hostile, Died Gun, Small Arms Fire Ground Casualty Undefined Code Invalid Date South Vietnam Quang Tin 1st Mar Div C Co 1st Recon Bn PEORIA Illinois 02E 92
BLANKENSHIP GODFRED 1912460 4/28/1938 Marine Corps Sergeant E5 Rifleman (USMC) 3/26/1967 Invalid Date Hostile, Died of Wounds Multiple Fragmentation Wounds Ground Casualty Undefined Code Invalid Date South Vietnam Quang Nam 1st Mar Div 1st Force 1st Recon Bn VICEY Virginia 17E 48
BOLAND WILLIAM JOSEPH JR 2381175 2/7/1949 Marine Corps Private First Class E2 Field Radio Operator (USMC) 6/29/1968 6/29/1968 2/10/1968 Hostile, Died Other Explosive Device Ground Casualty Undefined Code Invalid Date South Vietnam Quang Nam 1st Mar Div A Co 1st Recon Bn CICERO Illinois 54W 14
BOOKER JIMMY 2386415 8/11/1948 Marine Corps Lance Corporal E3 Rifleman (USMC) 3/6/1969 3/6/1969 2/19/1968 Non-Hostile, Died of Other Causes Intentional Homicide Ground Casualty Undefined Code Invalid Date South Vietnam Quang Nam 1st Mar Div C Co 1st Recon Bn LANSING Michigan 30W 51
BOSCO FRANK JOSEPH 2393298 2/3/1950 Marine Corps Lance Corporal E3 Rifleman (USMC) 6/21/1969 6/21/1969 10/2/1968 Hostile, Died Air Loss, Crash - Land Helicopter - NonCrew Undefined Code Invalid Date South Vietnam Quang Nam 1st Mar Div D Co 1st Recon Bn PROVIDENCE Rhode Island 22W 102
BROERMAN BARRY BERNARD 2199153 1/9/1946 Marine Corps Private First Class E2 Rifleman (USMC) 4/11/1967 4/11/1967 Invalid Date Hostile, Died Air Loss, Crash - Land Helicopter - NonCrew Undefined Code Invalid Date South Vietnam Quang Ngai 1st Mar Div D Co 1st Recon Bn CINCINNATI Ohio 18E 13
BROWN CURTIS CHARLES 2336161 9/24/1948 Marine Corps Private First Class E2 Rifleman (USMC) 7/15/1968 7/15/1968 3/25/1968 Hostile, Died Gun, Small Arms Fire Ground Casualty Undefined Code Invalid Date South Vietnam Thua Thien 1st Mar Div C Co 1st Recon Bn DALLAS Texas 52W 33
BURKE ROGER VINCENT PAUL 2040953 5/25/1943 Marine Corps Corporal E4 Undefined Code 2/6/1967 2/6/1967 Invalid Date Hostile, Died Other Explosive Device Ground Casualty Undefined Code Invalid Date South Vietnam Quang Tin 1st Mar Div D Co 1st Recon Bn GEORGETOWN Connecticut 14E 127
BUTTERFIELD CALVIN FRANKL 2381622 7/18/1949 Marine Corps Private First Class E2 Rifleman (USMC) 5/31/1968 3/24/1968 Hostile, Died of Wounds Other Explosive Device Ground Casualty Undefined Code Invalid Date South Vietnam Quang Nam 1st Mar Div E Co 1st Recon Bn PEKIN Illinois 62W 6
CAMPANELLO DARRELL EDWARD 2365780 10/15/1949 Marine Corps Private First Class E2 Rifleman (USMC) 6/3/1968 6/3/1968 12/2/1967 Hostile, Died Other Explosive Device Ground Casualty Undefined Code Invalid Date South Vietnam Quang Nam 1st Mar Div B Co 1st Recon Bn SILVER SPRING Maryland 61W 21
CAPUTO JAMES WILLIAM 2076501 4/13/1946 Marine Corps Lance Corporal E3 Rifleman (USMC) 6/28/1966 6/28/1966 Invalid Date Hostile, Died Misadventure Ground Casualty Undefined Code Invalid Date South Vietnam Thua Thien 1st Mar Div B Co 1st Recon Bn NEW YORK New York 08E 103
CARANASIOS EVANGELOS K 2382513 3/22/1947 Marine Corps Lance Corporal E3 Field Radio Operator (USMC) 11/29/1968 11/29/1968 2/10/1968 Hostile, Died Gun, Small Arms Fire Ground Casualty Undefined Code Invalid Date South Vietnam Quang Nam 1st Mar Div B Co 1st Recon Bn ELKHART Indiana 37W 4
CARLISI IGNATIUS 2170881 10/6/1945 Marine Corps Private First Class E2 Rifleman (USMC) 6/16/1966 6/16/1966 Invalid Date Hostile, Died Multiple Fragmentation Wounds Ground Casualty Undefined Code Invalid Date South Vietnam Quang Tin Howard's Hill, Hill 55 Nui Vu Hill Mass S of Hiep Duc 1st Mar Div C Co 1st Recon Bn NEW YORK New York 08E 52
CARLSON GARY LEE 2463704 9/18/1948 Marine Corps Private First Class E2 Rifleman (USMC) 11/29/1968 11/29/1968 10/21/1968 Hostile, Died Gun, Small Arms Fire Ground Casualty Undefined Code Invalid Date South Vietnam Quang Nam 1st Mar Div B Co 1st Recon Bn SEATTLE Washington 37W 4
CARPER LORING WILLIAM JR 6894313 12/1/1946 Navy Hospitalman (Navy) E3 Undefined Code 5/17/1966 5/17/1966 Invalid Date Hostile, Died Multiple Fragmentation Wounds Ground Casualty Undefined Code Invalid Date South Vietnam Thua Thien 3rd Mar Div 1ST FORCE 3RD RECON BN WINCHESTER Virginia 07E 69
CLARK LAWRENCE EDWARD 2090502 7/3/1947 Marine Corps Private First Class E2 Rifleman (USMC) 10/10/1966 10/10/1966 Invalid Date Hostile, Died Other Explosive Device Ground Casualty Undefined Code Invalid Date South Vietnam Quang Tri 1st Mar Div C Co 1st Recon Bn AMBA Kentucky 11E 65
CLARK WILLIAM MARTIN 480668886 5/13/1951 Marine Corps Lance Corporal E3 Rifleman (USMC) 8/4/1970 8/4/1970 2/26/1970 Hostile, Died Multiple Fragmentation Wounds Ground Casualty Undefined Code Invalid Date South Vietnam Quang Nam 1st Mar Div 1st Recon Bn RUNNELLS Iowa 08W 81
COCKRELL JAMES WARREN JR 101818 8/13/1944 Marine Corps First Lieutenant O2 Infantry Officer (USMC) 5/26/1968 5/26/1968 12/6/1967 Hostile, Died Other Explosive Device Ground Casualty Undefined Code Invalid Date South Vietnam Quang Tri 1st Mar Div D Co 1st Recon Bn MACON Mississippi 66W 4
COLL WILLIAM PATRICK 89166 8/18/1938 Marine Corps Captain O3 Undefined Code 9/13/1967 9/13/1967 Invalid Date Hostile, Died Gun, Small Arms Fire Ground Casualty Undefined Code Invalid Date South Vietnam Quang Tin 1st Mar Div D Co 1st Recon Bn PHILADELPHIA Pennsylvania 26E 65
COLLIER LAWRENCE HENRY 2343179 8/21/1948 Marine Corps Private First Class E2 Rifleman (USMC) 10/17/1967 10/17/1967 6/18/1967 Hostile, Died Gun, Small Arms Fire Ground Casualty Undefined Code Invalid Date South Vietnam Quang Nam 1st Mar Div A Co 1st Recon Bn MEMPHIS Tennessee 28E 20
CORREA LUIS FELIPE 2030893 3/17/1947 Marine Corps Corporal E4 Rifleman (USMC) 6/25/1967 Invalid Date Hostile, Died of Wounds Other Explosive Device Ground Casualty Undefined Code Invalid Date South Vietnam Quang Nam 1st Mar Div C Co 1st Recon Bn NEW YORK New York 22E 61
COULOMBE FRANCIS JOSEPH 30369457 10/26/1949 Marine Corps Lance Corporal E3 Rifleman (USMC) 7/28/1969 10/19/1968 Hostile, Died of Wounds Other Explosive Device Ground Casualty Undefined Code Invalid Date South Vietnam Quang Tri 1st Mar Div D Co 1st Recon Bn GARDNER Massachusetts 20W 62
COUNCILL ARTHUR COBY III 2414006 3/5/1949 Marine Corps Private First Class E2 Rifleman (USMC) 6/21/1969 6/21/1969 3/6/1969 Hostile, Died Air Loss, Crash - Land Helicopter - NonCrew Undefined Code Invalid Date South Vietnam Quang Nam 1st Mar Div D Co 1st Recon Bn HAWTHORNE California 22W 103
CRAWFORD WILLIAM LLOYD 2147687 6/29/1947 Marine Corps Lance Corporal E3 Rifleman (USMC) 10/22/1966 10/22/1966 Invalid Date Non-Hostile, Died of Other Causes Other Accident Ground Casualty Undefined Code Invalid Date South Vietnam Quang Ngai 1st Mar Div B Co 1st Recon Bn PAULS VALLEY Oklahoma 11E 96
CRITES ROBERT LINCOLN JR 2497926 12/25/1949 Marine Corps Private First Class E2 Rifleman (USMC) 6/21/1969 6/21/1969 3/19/1969 Hostile, Died Air Loss, Crash - Land Helicopter - NonCrew Undefined Code Invalid Date South Vietnam Quang Nam 1st Mar Div D Co 1st Recon Bn COLTON California 22W 104
CULP KARL HOWARD 2383051 10/13/1950 Marine Corps Lance Corporal E3 Rifleman (USMC) 4/16/1969 4/16/1969 11/20/1968 Hostile, Died Other Explosive Device Ground Casualty Undefined Code Invalid Date South Vietnam Quang Nam 1st Mar Div E Co 1st Recon Bn FORT WORTH Texas 27W 93
DALHOUSE JOHN DUDLEY 89075 10/4/1940 Marine Corps Captain O3 Infantry Officer (USMC) 7/3/1968 7/3/1968 6/30/1968 Hostile, Died Air Loss, Crash - Land Helicopter - NonCrew Undefined Code Invalid Date South Vietnam Quang Nam 1st Mar Div H&S Co 1st Recon Bn MONTGOMERY Alabama 54W 41
DANIELS RUSSELL GLEN 527722405 9/23/1948 Navy Hospital Corpsman Second Class E5 Hospital Corpsman (NAVY) 11/18/1970 11/18/1970 2/17/1970 Hostile, Died Air Loss, Crash - Land Helicopter - NonCrew Undefined Code Invalid Date South Vietnam Quang Nam 1st Mar Div 1st Recon Bn PHOENIX Arizona 06W 66
DE GRAY JERRY FREDERICK 2320041 1/24/1947 Marine Corps Lance Corporal E3 Undefined Code 10/17/1967 7/30/1967 Hostile, Died of Wounds Gun, Small Arms Fire Ground Casualty Undefined Code Invalid Date South Vietnam Quang Nam 1st Mar Div 1st Recon Bn MILWAUKEE Wisconsin 28E 21
DEAN DONALD BING 2452512 3/29/1948 Marine Corps Private First Class E2 Rifleman (USMC) 1/26/1969 1/26/1969 10/20/1968 Hostile, Died Drowned, Suffocated Ground Casualty Undefined Code Invalid Date South Vietnam Quang Nam 1st Mar Div E Co 1st Recon Bn PORTLAND Maine 34W 82
DEAVERS KENNETH LAMAR JR 2156051 6/25/1947 Marine Corps Lance Corporal E3 Rifleman (USMC) 2/7/1967 2/7/1967 Invalid Date Hostile, Died Gun, Small Arms Fire Ground Casualty Undefined Code Invalid Date South Vietnam Quang Tin 1st Mar Div D Co 1st Recon Bn WILLIAMSPORT Maryland 15E 4
DELOZIER DAVID VINCENT 201387636 3/16/1950 Marine Corps Lance Corporal E3 Assaultman (USMC) 11/18/1970 11/18/1970 3/11/1970 Hostile, Died Air Loss, Crash - Land Helicopter - NonCrew Undefined Code Invalid Date South Vietnam Quang Nam 1st Mar Div 1st Recon Bn ALTOONA Pennsylvania 06W 67
DENNIS DAVID ALAN 2382272 6/4/1949 Marine Corps Lance Corporal E3 Rifleman (USMC) 11/12/1968 11/12/1968 11/24/1967 Non-Hostile, Died of Other Causes Other Accident Ground Casualty Undefined Code Invalid Date South Vietnam Quang Nam 1st Mar Div C Co 1st Recon Bn FORT WAYNE Indiana 39W 53
DORSETT ROY GEREAD 2269571 10/11/1947 Marine Corps Sergeant E5 Rifleman (USMC) 6/29/1968 6/29/1968 2/10/1968 Non-Hostile, Died of Other Causes Accidental Self-Destruction Ground Casualty Undefined Code Invalid Date South Vietnam Thua Thien 1st Mar Div 1st Force 1st Recon Bn SUPERIOR Arizona 54W 15
DOWLING JEAN PIERRE 2052726 8/22/1943 Marine Corps Lance Corporal E3 Rifleman (USMC) 1/29/1966 Invalid Date Hostile, Died While Missing Gun, Small Arms Fire Ground Casualty Undefined Code Invalid Date South Vietnam Quang Ngai 3rd Mar Div 1st Force 3rd Recon Bn MADISON Wisconsin 04E 107
DREW KENNETH LEE 2353093 2/4/1949 Marine Corps Private First Class E2 Rifleman (USMC) 6/29/1968 6/29/1968 2/1/1968 Hostile, Died Other Explosive Device Ground Casualty Undefined Code Invalid Date South Vietnam Quang Nam 1st Mar Div A Co 1st Recon Bn PORTLAND Oregon 54W 15
EAKIN SHELTON LEE 96591 2/17/1935 Marine Corps Second Lieutenant O1 Infantry Officer (USMC) 7/27/1966 Invalid Date Hostile, Died of Wounds Other Explosive Device Ground Casualty Undefined Code Invalid Date South Vietnam Quang Tin 1st Mar Div D Co 1st Recon Bn TEXARKANA Arkansas 09E 79
ECKENRODE MARCUS RICHARD 2348722 8/6/1946 Marine Corps Private First Class E2 Rifleman (USMC) 5/21/1968 5/21/1968 12/9/1967 Non-Hostile, Died of Other Causes Other Causes Ground Casualty Undefined Code Invalid Date South Vietnam Thua Thien 1st Mar Div C Co 1st Recon Bn MAR VISTA California 64E 13
EDGAR TERRECE EUGENE 2348038 9/7/1949 Marine Corps Lance Corporal E3 Rifleman (USMC) 6/3/1968 6/3/1968 2/1/1968 Hostile, Died Other Explosive Device Ground Casualty Undefined Code Invalid Date South Vietnam Quang Nam 1st Mar Div B Co 1st Recon Bn OILDALE California 61W 23
EVANS RICHARD WAYNE 248925523 5/6/1949 Marine Corps Corporal E4 Rifleman (USMC) 7/13/1970 7/13/1970 3/18/1969 Non-Hostile, Died of Other Causes Other Accident Ground Casualty Undefined Code Invalid Date South Vietnam Quang Nam 1st Mar Div H&S Co 1st Recon Bn ST PETERSBURG Florida 08W 14
FAULKNER LARRY FREEMAN 2328333 3/5/1948 Marine Corps Private First Class E2 Rifleman (USMC) 7/13/1967 7/13/1967 Invalid Date Non-Hostile, Died of Other Causes Accidental Self-Destruction Ground Casualty Undefined Code Invalid Date South Vietnam Quang Tin 1st Mar Div D Co 1st Recon Bn CHISOLM Maine 23E 67
FERGUSON THOMAS BERNARD 103483 1/14/1943 Marine Corps Second Lieutenant O1 Basic Infantry Officer (USMC) 3/30/1968 Invalid Date Hostile, Died of Wounds Other Explosive Device Ground Casualty Undefined Code Invalid Date South Vietnam Quang Tri 1st Mar Div 1st Force 1st Recon Bn RUMFORD Maine 47E 10
FLEMING PATRICK JAY 2248507 5/30/1948 Marine Corps Lance Corporal E3 Rifleman (USMC) 8/15/1967 8/15/1967 Invalid Date Hostile, Died Multiple Fragmentation Wounds Ground Casualty Undefined Code Invalid Date South Vietnam Quang Tin 1st Mar Div A Co 1st Recon Bn ANACONDA Montana 24E 113
FORD VICTOR JAMES 2096976 10/4/1943 Marine Corps Lance Corporal E3 Rifleman (USMC) 4/29/1966 4/29/1966 Invalid Date Hostile, Died Gun, Small Arms Fire Ground Casualty Undefined Code Invalid Date South Vietnam Thua Thien 3rd Mar Div 1st Force 3rd Recon Bn UPPER DARBY Pennsylvania 07E 8
FULFORD JIMMY DON 2144641 11/28/1947 Marine Corps Lance Corporal E3 Rifleman (USMC) 7/12/1968 7/12/1968 2/7/1968 Non-Hostile, Died of Other Causes Other Causes Ground Casualty Undefined Code Invalid Date South Vietnam Quang Nam 1st Mar Div A Co 1st Recon Bn RUSSELLVILLE Arkansas 52W 18
GAGNE DONALD 2159997 1/16/1946 Marine Corps Lance Corporal E3 Field Radio Operator (USMC) 11/4/1966 11/4/1966 Invalid Date Non-Hostile, Died of Other Causes Drowned, Suffocated Ground Casualty Undefined Code Invalid Date South Vietnam Quang Tin 1st Mar Div C Co 1st Recon Bn FALL RIVER Massachusetts 12E 21
GARCIA MARCIAL BONDOC 2387587 4/16/1949 Marine Corps Lance Corporal E3 Rifleman (USMC) 6/4/1968 12/2/1967 Hostile, Died of Wounds Misadventure Ground Casualty Undefined Code Invalid Date South Vietnam Thua Thien 1st Mar Div 1st Recon Bn SAN FRANCISCO California 60W 9
GIER DAVID JULIAN 2062022 6/2/1946 Marine Corps Private First Class E2 Undefined Code 3/13/1966 3/13/1966 Invalid Date Hostile, Died Gun, Small Arms Fire Ground Casualty Undefined Code Invalid Date South Vietnam Quang Tin 1st Mar Div C Co 1st Recon Bn HONOLULU Hawaii 06E 5
GIERMAN WALTER EDWARD II 2418052 9/18/1947 Marine Corps Lance Corporal E3 Undefined Code 4/16/1969 4/16/1969 3/3/1969 Hostile, Died Multiple Fragmentation Wounds Ground Casualty Undefined Code Invalid Date South Vietnam Quang Nam 1st Mar Div E Co 1st Recon Bn LAKE WORTH Florida 27W 94
GILBERT FRANKLIN DELANO R 1869031 9/17/1941 Marine Corps Private First Class E2 Rifleman (USMC) 2/28/1966 2/28/1966 Invalid Date Hostile, Died Misadventure Ground Casualty Undefined Code Invalid Date South Vietnam Quang Nam 1st Mar Div 1st Recon Bn ORANGE Texas 05E 85
GILL ROBERT EARL 2409238 9/20/1949 Marine Corps Private First Class E2 Rifleman (USMC) 4/16/1969 4/16/1969 12/8/1968 Hostile, Died Other Explosive Device Ground Casualty Undefined Code Invalid Date South Vietnam Quang Nam 1st Mar Div A Co 1st Recon Bn MOBILE Alabama 27W 94
GILMORE WILLIAM ALAN 2210599 3/26/1947 Marine Corps Lance Corporal E3 Undefined Code 9/7/1967 9/7/1967 Invalid Date Hostile, Died Gun, Small Arms Fire Ground Casualty Undefined Code Invalid Date South Vietnam Quang Nam 1st Mar Div 1st Force 1st Recon Bn ALEXANDRIA Lousiana 26E 24
GLAWE THOMAS DUANE 2130228 3/4/1948 Marine Corps Private First Class E2 Mortarman (USMC) 6/16/1966 6/16/1966 Invalid Date Hostile, Died Multiple Fragmentation Wounds Ground Casualty Undefined Code Invalid Date South Vietnam Quang Tin Howard's Hill, Hill 55 Nui Vu Hill Mass S of Hiep Duc 1st Mar Div C Co 1st Recon Bn ROCKFORD Illinois 08E 52
GOERS LOUIS LLOYD 7950906 4/6/1946 Navy Hospital Corpsman Third Class (Navy) E4 Hospital Corpsman (NAVY) 4/21/1967 4/21/1967 Invalid Date Hostile, Died Other Causes Ground Casualty Undefined Code Invalid Date South Vietnam Quang Tin 1st Mar Div 1ST RECON BN STEGER Illinois 18E 58
GOLDMEYER CHARLES HENRY 553807571 3/11/1949 Marine Corps Private First Class E2 Rifleman (USMC) 9/25/1969 2/11/1969 Hostile, Died of Wounds Other Explosive Device Ground Casualty Undefined Code Invalid Date South Vietnam Quang Nam 1st Mar Div A Co 1st Recon Bn SAN DIEGO California 17W 7
GOSZEWSKI THOMAS WALTER 490564123 9/22/1950 Marine Corps Corporal E4 Rifleman (USMC) 11/27/1970 7/22/1970 Hostile, Died of Wounds Multiple Fragmentation Wounds Ground Casualty Undefined Code Invalid Date South Vietnam Quang Nam 1st Mar Div A Co 1st Recon Bn DELLWOOD Missouri 06W 86
GRAY ARTHUR POWELL IV 225601533 7/5/1946 Marine Corps First Lieutenant O2 Infantry Officer (USMC) 7/19/1970 11/2/1969 Non-Hostile, Died of Illness/Injury Other Accident Ground Casualty Undefined Code Invalid Date South Vietnam Quang Nam 1st Mar Div H&S Co 1st Recon Bn RICHMOND Virginia 08W 31
GREENE ARTHUR WILLIE 2225272 6/29/1942 Marine Corps Private E1 Rifleman (USMC) 1/20/1967 1/20/1967 Invalid Date Hostile, Died Misadventure Ground Casualty Undefined Code Invalid Date South Vietnam Quang Nam 1st Mar Div B Co 1st Recon Bn FORT PIERCE Florida 14E 56
GRIFFIN HAROLD DEXTER 2148065 10/19/1945 Marine Corps Corporal E4 Rifleman (USMC) 5/29/1967 5/29/1967 Invalid Date Hostile, Died Artillery, Rocket, Mortar Ground Casualty Undefined Code Invalid Date South Vietnam Quang Tin 1st Mar Div A Co 1st Recon Bn CANTON North Carolina 21E 13
GRISSETT EDWIN RUSSELL JR 455685990 9/19/1943 Marine Corps Sergeant E5 Rifleman (USMC) 1/22/1966 12/2/1968 Invalid Date Hostile, Died While Captured Other Causes Ground Casualty Body Subsequently Recovered Invalid Date South Vietnam Quang Ngai 3rd Mar Div 1st Force Recon Co 3rd Recon Bn SAN JUAN Texas 04E 82
GUILLORY WILLIAM ALLEN 2094452 3/31/1946 Marine Corps Corporal E4 Rifleman (USMC) 7/19/1967 7/19/1967 Invalid Date Hostile, Died Other Explosive Device Ground Casualty Undefined Code Invalid Date South Vietnam Quang Tin 1st Mar Div A Co 1st Recon Bn WESTLAKE Lousiana 23E 91
HALL JAMES OSCAR JR 2498173 5/2/1949 Marine Corps Private First Class E2 Rifleman (USMC) 6/21/1969 6/21/1969 2/21/1969 Hostile, Died Air Loss, Crash - Land Helicopter - NonCrew Undefined Code Invalid Date South Vietnam Quang Nam 1st Mar Div D Co 1st Recon Bn VISTA California 22W 105
HALL KENNETH ROBERT 1375613 5/28/1935 Marine Corps Staff Sergeant E6 Infantry Unit Leader (USMC) 4/24/1966 4/24/1966 Invalid Date Hostile, Died Gun, Small Arms Fire Ground Casualty Undefined Code Invalid Date South Vietnam Thua Thien 3rd Mar Div 1st Force 3rd Recon Bn KEENE New Hampshire 06E 132
HANEY ROBERT ALAN 476600957 9/10/1950 Marine Corps Private First Class E2 Rifleman (USMC) 8/30/1969 7/9/1969 Hostile, Died of Wounds Artillery, Rocket, Mortar Ground Casualty Undefined Code Invalid Date South Vietnam Quang Nam 1st Mar Div E Co 1st Recon Bn DULUTH Minnesota 18W 11
HARDWICK WILLIAM HIXSON 2266943 8/15/1946 Marine Corps Private First Class E2 Rifleman (USMC) 11/24/1966 11/24/1966 Invalid Date Hostile, Died Gun, Small Arms Fire Ground Casualty Undefined Code Invalid Date South Vietnam Quang Nam 1st Mar Div C Co 1st Recon Bn DALLAS Texas 12E 115
HARRIS CHARLES EDWARD 2312798 8/19/1947 Marine Corps Lance Corporal E3 Rifleman (USMC) 1/14/1968 1/14/1968 9/25/1967 Hostile, Died Gun, Small Arms Fire Ground Casualty Undefined Code Invalid Date South Vietnam Thua Thien 1st Mar Div 1st Recon Bn NORFOLK Virginia 34E 48
HARVEY CLEVELAND RAY 228587948 6/16/1947 Marine Corps First Lieutenant O2 Infantry Officer (USMC) 11/18/1970 11/18/1970 7/13/1970 Hostile, Died Air Loss, Crash - Land Helicopter - NonCrew Undefined Code Invalid Date South Vietnam Quang Nam 1st Mar Div 1st Recon Bn ALEXANDRIA Virginia 06W 67
HAWLEY JOHN HARRISON 2183653 12/15/1945 Marine Corps Lance Corporal E3 Undefined Code 4/11/1967 4/11/1967 Invalid Date Hostile, Died Misadventure Ground Casualty Undefined Code Invalid Date South Vietnam Quang Nam 1st Mar Div C Co 1st Recon Bn INDIANAPOLIS Indiana 18E 14
HEINEMEIER CHARLES THOMAS 334401939 3/2/1949 Marine Corps Lance Corporal E3 Rifleman (USMC) 8/21/1969 12/10/1968 Hostile, Died of Wounds Gun, Small Arms Fire Ground Casualty Undefined Code Invalid Date South Vietnam Quang Nam 1st Mar Div 1st Recon Bn BUNKER HILL Illinois 19W 86
HERRERA FELIPE 2341619 3/20/1948 Marine Corps Lance Corporal E3 Rifleman (USMC) 9/20/1968 9/20/1968 2/1/1968 Navy Cross Hostile, Died Gun, Small Arms Fire Ground Casualty Undefined Code Invalid Date South Vietnam Quang Na Thoung Due 1st Mar Div A Co 1st Recon Bn SAN ANTONIO Texas 43W 46
HICKS GLEN RAY 2302511 11/6/1947 Marine Corps Sergeant E5 Rifleman (USMC) 8/1/1968 8/1/1968 9/6/1967 Hostile, Died Gun, Small Arms Fire Ground Casualty Undefined Code Invalid Date South Vietnam Quang Nam 1st Mar Div E Co 1st Recon Bn OKLAHOMA CITY Oklahoma 50W 42
HILL JOSEPH ARNOLD 2324368 12/22/1947 Marine Corps Lance Corporal E3 Rifleman (USMC) 5/28/1968 5/28/1968 Invalid Date Hostile, Died Other Explosive Device Ground Casualty Body Not Recovered Invalid Date South Vietnam Quang Nam 1st Mar Div B Co 1st Recon Bn TAYLORVILLE Illinois 64W 10
HOLKEM JIMMY RAY 419484257 6/1/1948 Marine Corps Lance Corporal E3 Rifleman (USMC) 9/1/1970 9/1/1970 7/25/1970 Non-Hostile, Died of Other Causes Other Accident Ground Casualty Undefined Code Invalid Date South Vietnam Quang Nam 1st Mar Div B Co 1st Recon Bn STEVENSON Alabama 07W 30
HOMBEL RAY EARL 531527603 2/21/1949 Marine Corps Lance Corporal E3 Field Radio Operator (USMC) 8/12/1969 8/12/1969 3/18/1969 Hostile, Died Other Explosive Device Ground Casualty Undefined Code Invalid Date South Vietnam Quang Nam 1st Mar Div C Co 1st Recon Bn SPOKANE Washington 19W 15
HOPSON ROE JR 403709378 12/25/1948 Marine Corps Sergeant E5 Rifleman (USMC) 6/1/1970 6/1/1970 7/11/1969 Hostile, Died Multiple Fragmentation Wounds Ground Casualty Undefined Code Invalid Date South Vietnam Quang Nam 1st Mar Div B Co 1st Recon Bn MILO Kentucky 10W 130
HOUSE ALTON 2338829 6/24/1949 Marine Corps Private First Class E2 Mortarman (USMC) 7/3/1968 7/3/1968 12/2/1967 Hostile, Died Air Loss, Crash - Land Helicopter - NonCrew Undefined Code Invalid Date South Vietnam Quang Nam 1st Mar Div B Co 1st Recon Bn WALSTONBURG North Carolina 53W 6
HUDSON GARY DUANE 495563687 3/13/1950 Marine Corps Lance Corporal E3 Undefined Code 11/18/1970 11/18/1970 6/30/1970 Hostile, Died Air Loss, Crash - Land Helicopter - NonCrew Undefined Code Invalid Date South Vietnam Quang Nam 1st Mar Div 1st Recon Bn JOPLIN Missouri 06W 68
HUFF JAMES EDMOND 2152547 2/20/1948 Marine Corps Sergeant E5 Rifleman (USMC) 10/27/1967 10/27/1967 12/23/1966 Hostile, Died Drowned, Suffocated Ground Casualty Undefined Code Invalid Date South Vietnam Quang Nam 1st Mar Div 1st Recon Bn HUNTSVILLE Alabama 28E 82
HUFF CHARLES FRANK 2359441 4/30/1946 Marine Corps Lance Corporal E3 Field Radio Operator (USMC) 6/3/1968 6/3/1968 12/17/1967 Hostile, Died Other Explosive Device Ground Casualty Undefined Code Invalid Date South Vietnam Quang Nam 1st Mar Div B Co 1st Recon Bn CHICAGO Illinois 60W 2
HUGHES WILLIAM BURDICK 1832852 2/22/1940 Marine Corps Staff Sergeant E6 Infantry Unit Leader (USMC) 5/22/1968 5/22/1968 1/25/1968 Hostile, Died Other Explosive Device Ground Casualty Undefined Code Invalid Date South Vietnam Thua Thien 1st Mar Div D Co 1st Recon Bn VANCEBURG Kentucky 65E 9
JACKSON DONALD GENE 2349206 3/16/1948 Marine Corps Lance Corporal E3 Rifleman (USMC) 4/23/1968 4/23/1968 10/20/1967 Hostile, Died Other Explosive Device Ground Casualty Undefined Code Invalid Date South Vietnam Thua Thien 1st Mar Div C Co 1st Recon Bn LAKESIDE California 51E 39
JARMOLINSKI CHESTER JR 2255237 1/27/1948 Marine Corps Lance Corporal E3 Field Radio Operator (USMC) 4/16/1969 4/16/1969 10/2/1968 Hostile, Died Other Explosive Device Ground Casualty Undefined Code Invalid Date South Vietnam Quang Nam 1st Mar Div A Co 1st Recon Bn JERSEY CITY New Jersey 27W 94
JENNINGS THOMAS EDWARD 2264226 7/3/1948 Marine Corps Private First Class E2 Rifleman (USMC) 3/5/1968 3/5/1968 9/23/1967 Hostile, Died Other Explosive Device Ground Casualty Undefined Code Invalid Date South Vietnam Quang Nam 1st Mar Div 1st Recon Bn LANCASTER Pennsylvania 43E 7
JENSEN ALAN THEODORE 1949496 8/12/1942 Marine Corps Sergeant E5 Rifleman (USMC) 10/17/1967 10/17/1967 5/29/1967 Hostile, Died Other Explosive Device Ground Casualty Undefined Code Invalid Date South Vietnam Thua Thien 1st Mar Div 1st Recon Bn HALES CORNERS Wisconsin 28E 26
JOHNSON LARRY ALLEN 2232731 2/27/1947 Marine Corps Sergeant E5 Field Radio Operator (USMC) 9/20/1968 9/20/1968 5/1/1968 Hostile, Died Gun, Small Arms Fire Ground Casualty Undefined Code Invalid Date South Vietnam Quang Nam 1st Mar Div A Co 1st Recon Bn VARNA Illinois 43W 47
JOHNSON RALPH HENRY 2356797 1/11/1949 Marine Corps Private First Class E2 Rifleman (USMC) 3/5/1968 3/5/1968 1/1/1968 Medal of Honor Hostile, Died Other Explosive Device Ground Casualty Undefined Code Invalid Date South Vietnam Quang Nam 1st Mar Div A Co 1st Recon Bn CHARLESTON South Carolina 43E 8
JOHNSON RICHARD S JR 94438 10/24/1943 Marine Corps Second Lieutenant O1 Infantry Officer (USMC) 3/26/1967 3/26/1967 Invalid Date Hostile, Died Gun, Small Arms Fire Ground Casualty Undefined Code Invalid Date South Vietnam Quang Ngai 1st Mar Div 1st Recon Bn TUSCUMBIA Alabama 17E 52
JOHNSON WILLIAM D JR 2357895 3/9/1948 Marine Corps Corporal E4 Rifleman (USMC) 7/3/1968 7/3/1968 9/23/1967 Hostile, Died Air Loss, Crash - Land Helicopter - NonCrew Undefined Code Invalid Date South Vietnam Quang Nam 1st Mar Div B Co 1st Recon Bn KOKOMO Indiana 53W 1
JOHNSTON CLEMENT B JR 2116397 7/12/1947 Marine Corps Lance Corporal E3 Rifleman (USMC) 4/28/1966 Invalid Date Navy Cross Hostile, Died of Wounds Other Explosive Device Ground Casualty Undefined Code Invalid Date South Vietnam Quang Ngai 1st Mar Div D Co 1st Recon Bn PITTSBURGH Pennsylvania 07E 5
JONES JAMES HOWARD 2366047 4/1/1947 Marine Corps Lance Corporal E3 Rifleman (USMC) 8/1/1968 8/1/1968 11/29/1967 Hostile, Died Gun, Small Arms Fire Ground Casualty Undefined Code Invalid Date South Vietnam Quang Nam 1st Mar Div E Co 1st Recon Bn BELTSVILLE Maryland 50W 43
JONES JOSEPH JOHN 2147920 10/13/1946 Marine Corps Sergeant E5 Rifleman (USMC) 7/3/1968 7/3/1968 12/19/1966 Hostile, Died Air Loss, Crash - Land Helicopter - NonCrew Undefined Code Invalid Date South Vietnam Quang Nam 1st Mar Div B Co 1st Recon Bn SCOTLAND NECK North Carolina 53W 2
KEATING DANIEL JAMES JR 75776 10/26/1935 Marine Corps Major O4 Infantry Officer (USMC) 5/22/1968 9/4/1967 Hostile, Died of Wounds Other Explosive Device Ground Casualty Undefined Code Invalid Date South Vietnam Thua Thien 1st Mar Div B Co 1st Recon Bn LARCHMONT New York 65E 12
KITZKE RONALD FREDERICK 2286388 5/13/1947 Marine Corps Lance Corporal E3 Rifleman (USMC) 12/27/1967 12/27/1967 3/28/1967 Hostile, Died Gun, Small Arms Fire Ground Casualty Undefined Code Invalid Date South Vietnam Quang Nam 1st Mar Div B Co 1st Recon Bn WAUWATOSA Wisconsin 32E 76
KMETYK JONATHAN PETER 2306039 8/17/1947 Marine Corps Lance Corporal E3 Rifleman (USMC) 11/14/1967 11/14/1967 Invalid Date Hostile, Died Gun, Small Arms Fire Ground Casualty Body Not Recovered Invalid Date South Vietnam Quang Nam 1st Mar Div C Co 1st Recon Bn NIAGARA FALLS New York 29E 96
KUCHTA JOHN VINCENT 2245127 12/21/1948 Marine Corps Lance Corporal E3 Rifleman (USMC) 2/6/1969 2/6/1969 4/5/1968 Hostile, Died Gun, Small Arms Fire Ground Casualty Undefined Code Invalid Date South Vietnam Quang Nam 1st Mar Div D Co 1st Recon Bn WARRIOR RUN Pennsylvania 33W 72
KUPKA ANTHONY EDWARD 106322 2/20/1946 Marine Corps Second Lieutenant O1 Basic Infantry Officer (USMC) 4/16/1969 4/16/1969 3/16/1969 Hostile, Died Multiple Fragmentation Wounds Ground Casualty Undefined Code Invalid Date South Vietnam Quang Nam 1st Mar Div E Co 1st Recon Bn FALMOUTH Massachusetts 27W 95
LA PORTE BRUCE STEPHEN 9156314 2/28/1947 Navy Hospitalman (Navy) E3 Undefined Code 2/20/1967 Invalid Date Hostile, Died of Wounds Gun, Small Arms Fire Ground Casualty Undefined Code Invalid Date South Vietnam Quang Ngai 1st Mar Div A CO 1ST RECON BN FRUITPORT Michigan 15E 66
LAKIN JOHN HAYES 107288 6/14/1946 Marine Corps Second Lieutenant O1 Basic Infantry Officer (USMC) 5/24/1969 5/24/1969 4/5/1969 Non-Hostile, Died of Other Causes Accidental Self-Destruction Ground Casualty Undefined Code Invalid Date South Vietnam Quang Nam 1st Mar Div E Co 1st Recon Bn FORT WALTON BEACH Florida 24W 96
LAPORTE MICHAEL LOUIS 556646601 8/21/1944 Navy Chief Hospital Corpsman (Navy) E7 Undefined Code 9/5/1967 12/2/1977 Invalid Date Hostile, Died While Missing Air Loss, Crash - Land Helicopter - Crew Body Not Recovered Invalid Date South Vietnam Quang Nam 1st Mar Div 1ST FORCE 1ST RECON BN LOS ANGELES California 26E 1
LAY ROGER MINETT 2369510 5/9/1948 Marine Corps Private First Class E2 Rifleman (USMC) 1/25/1968 1/25/1968 11/29/1967 Hostile, Died Gun, Small Arms Fire Ground Casualty Undefined Code Invalid Date South Vietnam Thua Thien 1st Mar Div E Co 1st Recon Bn MILFORD Ohio 35E 33
LEED CARL ROBERT 1289555 1/18/1935 Marine Corps Staff Sergeant E6 Infantry Unit Leader (USMC) 2/29/1968 2/29/1968 4/4/1967 Hostile, Died Artillery, Rocket, Mortar Ground Casualty Undefined Code Invalid Date South Vietnam Thua Thien 1st Mar Div C Co 1st Recon Bn WEST FAIRVIEW Pennsylvania 42E 6
LEFTWICH WILLIAM GROOM JR 413465361 4/28/1931 Marine Corps Lieutenant Colonel O5 Infantry Officer (USMC) 11/18/1970 11/18/1970 4/20/1970 Hostile, Died Air Loss, Crash - Land Helicopter - NonCrew Undefined Code Invalid Date South Vietnam Quang Nam 1st Mar Div 1st Recon Bn GERMANTOWN Tennessee 06W 68
LERCH EARL ROGER 6960385 4/25/1946 Navy Hospital Corpsman Third Class (Navy) E4 Hospital Corpsman (NAVY) 6/4/1968 6/4/1968 1/8/1968 Hostile, Died Other Explosive Device Ground Casualty Undefined Code Invalid Date South Vietnam Quang Nam 1st Mar Div B CO 1ST RECON BN SAN FRANCISCO California 60W 10
LIGGETT DURAND GARFIELD 2296366 5/25/1948 Marine Corps Private First Class E2 Rifleman (USMC) 5/8/1967 5/8/1967 Invalid Date Hostile, Died Gun, Small Arms Fire Ground Casualty Undefined Code Invalid Date South Vietnam Quang Nam 1st Mar Div C Co 1st Recon Bn DOWNEY California 19E 62
LOVELL ERVIN 2297720 7/11/1946 Marine Corps Private First Class E2 Rifleman (USMC) 5/14/1967 5/14/1967 Invalid Date Hostile, Died Other Explosive Device Ground Casualty Undefined Code Invalid Date South Vietnam Quang Tri 1st Mar Div D Co 1st Recon Bn ONTARIO California 19E 120
LYONS JOSEPH WALTER 2315470 10/2/1945 Marine Corps Corporal E4 Rifleman (USMC) 6/5/1968 6/5/1968 1/28/1968 Hostile, Died Gun, Small Arms Fire Ground Casualty Undefined Code Invalid Date South Vietnam Thua Thien 1st Mar Div 1st Force 1st Recon Bn PHOENIX Arizona 60W 19
MANELA RANDALL PAUL 544567455 5/14/1951 Marine Corps Corporal E4 Rifleman (USMC) 11/18/1970 11/18/1970 2/26/1970 Hostile, Died Air Loss, Crash - Land Helicopter - NonCrew Undefined Code Invalid Date South Vietnam Quang Nam 1st Mar Div 1st Recon Bn EUGENE Oregon 06W 68
MARKILLIE JOHN ROY 7726246 3/3/1946 Navy Hospital Corpsman Third Class (Navy) E4 Hospital Corpsman (NAVY) 6/21/1966 Invalid Date Hostile, Died of Wounds Artillery, Rocket, Mortar Ground Casualty Undefined Code Invalid Date South Vietnam Quang Tin 1st Mar Div C Co 1st Recon Bn MODESTO California 08E 72
MARTIN LAWRENCE 2320061 4/26/1948 Marine Corps Private First Class E2 Rifleman (USMC) 3/10/1967 3/10/1967 Invalid Date Hostile, Died Other Explosive Device Ground Casualty Undefined Code Invalid Date South Vietnam Quang Ngai 1st Mar Div 1st Recon Bn NEW YORK New York 16E 53
MARTIN WILLIAM EVERETT 99730 2/20/1938 Marine Corps Second Lieutenant O1 Infantry Officer (USMC) 6/3/1967 6/3/1967 Invalid Date Hostile, Died Gun, Small Arms Fire Ground Casualty Undefined Code Invalid Date South Vietnam Quang Tin 1st Mar Div 1st Recon Bn PRESCOTT Arizona 21E 48
MASCARENAS ALCADIO NORBER 2129236 6/6/1944 Marine Corps Lance Corporal E3 Rifleman (USMC) 6/16/1966 6/16/1966 Invalid Date Hostile, Died of Wounds Gun, Small Arms Fire Ground Casualty Undefined Code Invalid Date South Vietnam Quang Tin Howard's Hill, Hill 55 Nui Vu Hill Mass S of Hiep Duc 1st Mar Div C Co 1st Recon Bn SAPELLO New Mexico 08E 53
MC INTOSH JOHN ARTHUR 2329095 12/26/1946 Marine Corps Private First Class E2 Rifleman (USMC) 2/5/1968 2/5/1968 11/18/1967 Hostile, Died Gun, Small Arms Fire Ground Casualty Undefined Code Invalid Date South Vietnam Thua Thien 1st Mar Div 1st Force 1st Recon Bn EAST BOSTON Massachusetts 37E 41
MC KINNEY JAMES ODAS 2055426 10/30/1947 Marine Corps Private First Class E2 Rifleman (USMC) 6/16/1966 6/16/1966 Invalid Date Hostile, Died Multiple Fragmentation Wounds Ground Casualty Undefined Code Invalid Date South Vietnam Quang Tin Howard's Hill, Hill 55 Nui Vu Hill Mass S of Hiep Duc 1st Mar Div C Co 1st Recon Bn MONROE Lousiana 08E 53
MC LAUGHLIN FRANCIS 228741337 5/30/1950 Marine Corps Private First Class E2 Assaultman (USMC) 8/18/1969 3/15/1969 Hostile, Died of Wounds Misadventure Ground Casualty Undefined Code Invalid Date South Vietnam Quang Nam 1st Mar Div 1st Force 1st Recon Bn CHATHAM Virginia 19W 62
MC VEY LAVOY DON 521448976 2/22/1938 Marine Corps Captain O3 Infantry Officer (USMC) 3/2/1970 3/2/1970 Invalid Date Hostile, Died Misadventure Ground Casualty Body Not Recovered Invalid Date South Vietnam Quang Nam 1st Mar Div C Co 1st Recon Bn LAMAR Colorado 13W 75
MEDEGUARI RENE 2472824 4/11/1949 Marine Corps Private First Class E2 Rifleman (USMC) 5/2/1969 5/2/1969 11/20/1968 Hostile, Died Artillery, Rocket, Mortar Ground Casualty Undefined Code Invalid Date South Vietnam Quang Nam 1st Mar Div C Co 1st Recon Bn DOUGLAS Arizona 26W 101
MITCHELL DANIEL LEE 497520008 3/2/1948 Marine Corps Corporal E4 Rifleman (USMC) 8/1/1970 11/18/1969 Hostile, Died of Wounds Multiple Fragmentation Wounds Ground Casualty Undefined Code Invalid Date South Vietnam Quang Nam 1st Mar Div B Co 1st Recon Bn BALLWIN Missouri 08W 75
MONTEZ FRANK JAMES 549788812 1/18/1950 Marine Corps Corporal E4 Rifleman (USMC) 9/20/1969 9/20/1969 1/30/1968 Hostile, Died Gun, Small Arms Fire Ground Casualty Undefined Code Invalid Date South Vietnam Quang Nam 1st Mar Div A Co 1st Recon Bn SALINAS California 18W 117
MOON WILLIAM CHARLES 2359292 8/29/1949 Marine Corps Lance Corporal E3 Rifleman (USMC) 7/3/1968 7/3/1968 12/10/1967 Hostile, Died Air Loss, Crash - Land Helicopter - NonCrew Undefined Code Invalid Date South Vietnam Quang Nam 1st Mar Div B Co 1st Recon Bn JOLIET Illinois 53W 3
MOORE WILLIAM ROBERT 2060008 6/6/1945 Marine Corps Lance Corporal E3 Undefined Code 12/16/1965 Invalid Date Hostile, Died While Missing Multiple Fragmentation Wounds Ground Casualty Undefined Code Invalid Date South Vietnam Quang Tin 3rd Mar Div 1st Force Recon Co 3rd Recon Bn RICHMOND California 04E 18
MOORE JIMMY LEE 2308118 8/31/1947 Marine Corps Lance Corporal E3 Rifleman (USMC) 5/26/1968 8/16/1967 Hostile, Died of Wounds Other Explosive Device Ground Casualty Undefined Code Invalid Date South Vietnam Quang Tri 1st Mar Div D Co 1st Recon Bn GREENVILLE South Carolina 66W 10
MOWBRAY DOUGLAS RONALD 2170564 10/18/1945 Marine Corps Private First Class E2 Rifleman (USMC) 9/15/1966 9/15/1966 Invalid Date Hostile, Died Gun, Small Arms Fire Ground Casualty Undefined Code Invalid Date South Vietnam Quang Tri 1st Mar Div A Co 5th Recon Bn PEEKSKILL New York 10E 97
MURDOCK MICHAEL GEORGE 2277059 8/5/1946 Marine Corps Corporal E4 Undefined Code 2/1/1968 2/1/1968 3/9/1967 Hostile, Died Air Loss, Crash - Land Helicopter - NonCrew Undefined Code Invalid Date South Vietnam Quang Nam 1st Mar Div B Co 1st Recon Bn ROCKFORD Washington 36E 57
MURPHY DENNIS GERARD 2467070 10/10/1950 Marine Corps Private First Class E2 Rifleman (USMC) 6/18/1969 6/18/1969 1/31/1969 Hostile, Died Gun, Small Arms Fire Ground Casualty Undefined Code Invalid Date South Vietnam Quang Nam 1st Mar Div 1st Force Recon Co 1st Recon Bn COPIAGUE New York 22W 79
MURPHY PATRICK JAMES 2293492 3/8/1947 Marine Corps Corporal E4 Rifleman (USMC) 5/15/1968 5/15/1968 11/10/1967 Hostile, Died Artillery, Rocket, Mortar Ground Casualty Undefined Code Invalid Date South Vietnam Thua Thien 1st Mar Div 1st Force 1st Recon Bn LEVITTOWN New York 60E 26
MUSSELMAN HAROLD EARL 2443596 5/1/1949 Marine Corps Lance Corporal E3 Rifleman (USMC) 3/3/1969 3/3/1969 10/24/1968 Hostile, Died Misadventure Ground Casualty Undefined Code Invalid Date South Vietnam Quang Nam 1st Mar Div 1st Force 1st Recon Bn CENTERVILLE Indiana 30W 21
OLIVER DENNIS JERROD 2461997 3/5/1950 Marine Corps Private First Class E2 Rifleman (USMC) 4/23/1969 4/23/1969 2/17/1969 Hostile, Died Gun, Small Arms Fire Ground Casualty Undefined Code Invalid Date South Vietnam Quang Nam 1st Mar Div 1st Recon Bn MANASSAS Georgia 26W 34
ONETO HARRY STEVEN JR 2278170 12/19/1947 Marine Corps Corporal E4 Undefined Code 9/8/1968 9/8/1968 8/17/1967 Non-Hostile, Died of Other Causes Drowned, Suffocated Ground Casualty Undefined Code Invalid Date South Vietnam Quang Nam 1st Mar Div B Co 1st Recon Bn SUNNYVALE California 44W 4
ORSLAND GARY VARNER 2373931 7/15/1948 Marine Corps Private First Class E2 Rifleman (USMC) 7/29/1968 7/29/1968 12/30/1967 Hostile, Died Gun, Small Arms Fire Ground Casualty Undefined Code Invalid Date South Vietnam Quang Nam 1st Mar Div E Co 1st Recon Bn BRANSON Colorado 50W 32
PADILLA RONALD MATTHEW 1990595 2/16/1942 Marine Corps Lance Corporal E3 Rifleman (USMC) 6/14/1966 6/14/1966 Invalid Date Hostile, Died Other Explosive Device Ground Casualty Undefined Code Invalid Date South Vietnam Quang Tin 1st Mar Div C Co 1st Recon Bn HONOLULU Hawaii 08E 48
PATTERSON GEORGE WILLARD 2352436 7/6/1947 Marine Corps Lance Corporal E3 Rifleman (USMC) 7/12/1968 7/12/1968 8/20/1967 Non-Hostile, Died of Other Causes Other Causes Ground Casualty Undefined Code Invalid Date South Vietnam Quang Nam 1st Mar Div B Co 1st Recon Bn DETROIT Michigan 52W 19
PATTERSON JEFFERY SCOTT 2254470 7/17/1949 Marine Corps Private First Class E2 Rifleman (USMC) 6/3/1968 6/3/1968 3/11/1968 Hostile, Died Other Explosive Device Ground Casualty Undefined Code Invalid Date South Vietnam Quang Nam 1st Mar Div B Co 1st Recon Bn SPARTA New Jersey 60W 4
PEARCE HENRY ELLWOOD II B138244 4/3/1949 Navy Hospitalman (Navy) E3 Undefined Code 1/23/1969 1/23/1969 12/18/1968 Hostile, Died Gun, Small Arms Fire Ground Casualty Undefined Code Invalid Date South Vietnam Quang Nam 1st Mar Div 1st Recon Bn STAMHOPE New Jersey 34W 67
PENNINGTON DALE ALLEN 305588136 2/9/1950 Marine Corps Lance Corporal E3 Rifleman (USMC) 9/1/1970 9/1/1970 2/26/1970 Non-Hostile, Died of Other Causes Other Accident Ground Casualty Undefined Code Invalid Date South Vietnam Quang Nam 1st Mar Div B Co 1st Recon Bn CULVER Indiana 07W 32
POPE CHARLES ALFRED JR 492564409 2/14/1951 Marine Corps Lance Corporal E3 Rifleman (USMC) 11/18/1970 11/18/1970 3/14/1970 Hostile, Died Air Loss, Crash - Land Helicopter - NonCrew Undefined Code Invalid Date South Vietnam Quang Nam 1st Mar Div 1st Recon Bn INDEPENDENCE Missouri 06W 69
POPPA GERALD LELAND 2215726 7/21/1945 Marine Corps Sergeant E5 Undefined Code 8/1/1968 8/1/1968 10/11/1967 Hostile, Died Gun, Small Arms Fire Ground Casualty Undefined Code Invalid Date South Vietnam Quang Nam 1st Mar Div H&S Co 1st Recon Bn SALINAS California 50W 45
PRIDEAUX JAMES EARL 2287165 6/30/1946 Marine Corps Lance Corporal E3 Rifleman (USMC) 2/5/1968 2/5/1968 6/8/1967 Hostile, Died Other Explosive Device Ground Casualty Undefined Code Invalid Date South Vietnam Thua Thien 1st Mar Div 1st Recon Bn BRIGHTON Colorado 37E 42
RAGSDALE GARY WAYNE 562762164 9/6/1950 Marine Corps Lance Corporal E3 Rifleman (USMC) 6/14/1970 4/4/1970 Hostile, Died of Wounds Gun, Small Arms Fire Ground Casualty Undefined Code Invalid Date South Vietnam Quang Nam 1st Mar Div E Co 1st Recon Bn KERMAN California 09W 54
RASH WILLIAM GEORGE 1904575 10/26/1942 Marine Corps Staff Sergeant E6 Infantry Unit Leader (USMC) 8/21/1968 8/21/1968 9/9/1967 Hostile, Died Other Explosive Device Ground Casualty Undefined Code Invalid Date South Vietnam Quang Nam 1st Mar Div E Co 1st Recon Bn BALTIMORE Maryland 47W 21
RATHMELL HENRY PORTER 174360236 9/28/1946 Marine Corps First Lieutenant O2 Infantry Officer (USMC) 4/12/1970 4/12/1970 9/29/1969 Hostile, Died Multiple Fragmentation Wounds Ground Casualty Undefined Code Invalid Date South Vietnam Quang Nam 1st Mar Div H&S Co 1st Recon Bn MUNCY Pennsylvania 12W 128
RAUCH EDWARD HAROLD 2248486 9/4/1947 Marine Corps Lance Corporal E3 Rifleman (USMC) 10/17/1967 10/17/1967 3/9/1967 Hostile, Died Gun, Small Arms Fire Ground Casualty Undefined Code Invalid Date South Vietnam Quang Nam 1st Mar Div A Co 1st Recon Bn SAN FRANCISCO California 28E 30
REED RONALD LEE 2371534 2/27/1949 Marine Corps Private First Class E2 Rifleman (USMC) 11/12/1968 8/11/1968 Non-Hostile, Died of Illness/Injury Other Accident Ground Casualty Undefined Code Invalid Date South Vietnam Quang Nam 1st Mar Div C Co 1st Recon Bn BENTON Kentucky 39W 56
RHODES JOHN OWEN 2199835 11/8/1946 Marine Corps Lance Corporal E3 Rifleman (USMC) 4/1/1967 4/1/1967 Invalid Date Hostile, Died Gun, Small Arms Fire Ground Casualty Undefined Code Invalid Date South Vietnam Quang Ngai 1st Mar Div D Co 1st Recon Bn THONOTOSASSA Florida 17E 87
RILEY HARRY LEE JR 2380865 7/16/1947 Marine Corps Private First Class E2 Rifleman (USMC) 5/16/1968 5/16/1968 12/2/1967 Non-Hostile, Died of Other Causes Other Causes Ground Casualty Undefined Code Invalid Date South Vietnam Quang Nam 1st Mar Div D Co 1st Recon Bn CHICAGO Illinois 61E 17
RILEY MELVIN JOSEPH JR 2225033 3/14/1947 Marine Corps Lance Corporal E3 Rifleman (USMC) 9/1/1967 9/1/1967 Invalid Date Hostile, Died Gun, Small Arms Fire Ground Casualty Undefined Code Invalid Date South Vietnam Quang Tin 1st Mar Div D Co 1st Recon Bn HAZELWOOD Missouri 25E 79
ROBINSON MICHAEL BERNARD 251785655 10/5/1949 Marine Corps Corporal E4 Warehouse Clerk (USMC) 1/7/1970 1/7/1970 10/18/1969 Non-Hostile, Died of Other Causes Accidental Homicide Ground Casualty Undefined Code Invalid Date South Vietnam Quang Nam 1st Mar Div H&S Co 1st Recon Bn WICHITA Kansas 14W 9
ROBINSON TIMOTHY CHARLES 516589900 5/12/1950 Marine Corps Private First Class E2 Rifleman (USMC) 10/22/1969 10/22/1969 7/11/1969 Hostile, Died Gun, Small Arms Fire Ground Casualty Undefined Code Invalid Date South Vietnam Quang Nam 1st Mar Div C Co 1st Recon Bn KALISPELL Montana 17W 106
ROGERS ROBERT LEE 2376686 1/10/1948 Marine Corps Private First Class E2 Machine Gunner (USMC) 1/13/1968 1/13/1968 12/2/1967 Hostile, Died Other Explosive Device Ground Casualty Undefined Code Invalid Date South Vietnam Thua Thien 1st Mar Div D Co 1st Recon Bn MARYVILLE Tennessee 34E 44
ROMERO JOSEPH MICHAEL 2348035 11/5/1949 Marine Corps Lance Corporal E3 Rifleman (USMC) 3/23/1968 3/23/1968 2/1/1968 Hostile, Died Gun, Small Arms Fire Ground Casualty Undefined Code Invalid Date South Vietnam Quang Nam 1st Mar Div A Co 1st Recon Bn LAKEWOOD California 46E 1
ROSAS JOSE ANTONIO 1648675 9/22/1939 Marine Corps Staff Sergeant E6 Undefined Code 5/8/1967 5/8/1967 Invalid Date Hostile, Died Gun, Small Arms Fire Ground Casualty Undefined Code Invalid Date South Vietnam Quang Nam 1st Mar Div C Co 1st Recon Bn WESLACO Texas 19E 65
ROSE LEONARD DALE 2386987 3/6/1948 Marine Corps Private First Class E2 Field Radio Operator (USMC) 1/23/1969 1/23/1969 4/17/1968 Hostile, Died Gun, Small Arms Fire Ground Casualty Undefined Code Invalid Date South Vietnam Quang Nam 1st Mar Div 1st Force 1st Recon Bn HERLONG California 34W 67
RUDD ROBERT CHARLES 2211409 12/27/1945 Marine Corps Sergeant E5 Rifleman (USMC) 10/14/1967 10/14/1967 11/30/1966 Hostile, Died Gun, Small Arms Fire Ground Casualty Undefined Code Invalid Date South Vietnam Phu Bon 1st Mar Div C Co 1st Recon Bn DALLAS Texas 28E 4
SCHANCK WILLIAM G JR 107778 1/24/1948 Marine Corps Second Lieutenant O1 Basic Infantry Officer (USMC) 6/21/1969 6/21/1969 5/17/1969 Hostile, Died Air Loss, Crash - Land Helicopter - NonCrew Undefined Code Invalid Date South Vietnam Quang Nam 1st Mar Div D Co 1st Recon Bn CHEPACHET Rhode Island 22W 109
SCHECKLER PAUL 2347535 5/17/1949 Marine Corps Lance Corporal E3 Rifleman (USMC) 7/3/1968 7/3/1968 12/3/1967 Hostile, Died Air Loss, Crash - Land Helicopter - NonCrew Undefined Code Invalid Date South Vietnam Quang Nam 1st Mar Div B Co 1st Recon Bn HUNTINGDON VALLEY Pennsylvania 53W 4
SCHUSTER JOSEPH WILLIAM 2008866 9/2/1942 Marine Corps Corporal E4 Rifleman (USMC) 6/1/1966 6/1/1966 Invalid Date Non-Hostile, Died of Other Causes Other Accident Ground Casualty Undefined Code Invalid Date South Vietnam Thua Thien 3rd Mar Div 1st Force 3rd Recon Bn ALTOONA Pennsylvania 07E 131
SHAFER ROBERT LAURENCE 2085833 7/12/1944 Marine Corps Corporal E4 Rifleman (USMC) 2/4/1967 Invalid Date Hostile, Died of Wounds Other Explosive Device Ground Casualty Undefined Code Invalid Date South Vietnam Quang Ngai 1st Mar Div A Co 1st Recon Bn WINDSOR Illinois 14E 119
SHARMAN CHARLES W III 252706662 6/21/1946 Marine Corps First Lieutenant O2 Infantry Officer (USMC) 9/7/1969 9/7/1969 3/7/1969 Non-Hostile, Died of Other Causes Other Causes Ground Casualty Undefined Code Invalid Date South Vietnam Quang Nam 1st Mar Div E Co 1st Recon Bn DECATUR Georgia 18W 56
SHELTON CRAIG STEPHEN 2258022 8/22/1946 Marine Corps Private First Class E2 Rifleman (USMC) 1/25/1967 1/25/1967 Invalid Date Hostile, Died Gun, Small Arms Fire Ground Casualty Undefined Code Invalid Date South Vietnam Quang Tin 1st Mar Div 1st Recon Bn OMAHA Nebraska 14E 77
SIMMONS FAY CLYDE III 2278041 1/16/1949 Marine Corps Lance Corporal E3 Rifleman (USMC) 7/3/1968 7/3/1968 8/10/1967 Hostile, Died Air Loss, Crash - Land Helicopter - NonCrew Undefined Code Invalid Date South Vietnam Quang Nam 1st Mar Div B Co 1st Recon Bn CAYCE South Carolina 53W 5
SIMONS EDWARD JUNIOR 2233475 9/17/1948 Marine Corps Corporal E4 Rifleman (USMC) 10/14/1967 10/14/1967 11/29/1966 Hostile, Died Gun, Small Arms Fire Ground Casualty Undefined Code Invalid Date South Vietnam Phu Bon 1st Mar Div C Co 1st Recon Bn BLUEFIELD West Virginia 28E 5
SINCERE JAMES WALTER 2441862 11/15/1949 Marine Corps Private First Class E2 Rifleman (USMC) 11/22/1968 11/22/1968 10/3/1968 Hostile, Died Gun, Small Arms Fire Ground Casualty Undefined Code Invalid Date South Vietnam Quang Nam 1st Mar Div 1st Recon Bn EAST HARTFORD Connecticut 38W 38
SINEGAL LARRY JAMES 2384436 7/30/1949 Marine Corps Private First Class E2 Rifleman (USMC) 5/26/1968 5/26/1968 5/8/1968 Hostile, Died Gun, Small Arms Fire Ground Casualty Undefined Code Invalid Date South Vietnam Quang Tri 1st Mar Div D Co 1st Recon Bn HOUSTON Texas 66W 12
SISSON RONALD PAUL 2089489 10/26/1942 Marine Corps Lance Corporal E3 Undefined Code 12/16/1965 Invalid Date Hostile, Died While Missing Gun, Small Arms Fire Ground Casualty Undefined Code Invalid Date South Vietnam Quang Tin 3rd Mar Div 1st Force 3rd Recon Bn HULBERTON New York 04E 19
SKIBBE DAVID WILLIAM 332388613 10/22/1946 Marine Corps Second Lieutenant O1 Infantry Officer (USMC) 3/2/1970 3/2/1970 Invalid Date Navy Cross Hostile, Died Misadventure Ground Casualty Body Not Recovered Invalid Date South Vietnam Quang Nam 1st Mar Div C Co 1st Recon Bn DES PLAINES Illinois 13W 75
SLATER JOHN EDWARD 106368 9/27/1946 Marine Corps Second Lieutenant O1 Basic Infantry Officer (USMC) 12/15/1968 12/15/1968 11/3/1968 Hostile, Died Other Causes Ground Casualty Undefined Code Invalid Date South Vietnam Quang Nam 1st Mar Div 1st Recon Bn MARSHALLTOWN Iowa 36W 27
SMITH EDWARD FRANCIS 2290347 4/4/1947 Marine Corps Private First Class E2 Rifleman (USMC) 2/4/1967 Invalid Date Hostile, Died of Wounds Other Explosive Device Ground Casualty Undefined Code Invalid Date South Vietnam Quang Ngai 1st Mar Div A Co 1st Recon Bn EASTON Massachusetts 14E 119
SMITH MICHAEL RAY 2214897 6/6/1945 Marine Corps Lance Corporal E3 Rifleman (USMC) 5/13/1967 5/13/1967 Invalid Date Hostile, Died Gun, Small Arms Fire Ground Casualty Undefined Code Invalid Date South Vietnam Quang Nam 1st Mar Div B Co 1st Recon Bn SPINDALE North Carolina 19E 113
SMITH SCOTT GARY 2404917 6/5/1947 Marine Corps Private First Class E2 Field Radio Operator (USMC) 8/1/1968 8/1/1968 4/17/1968 Hostile, Died Gun, Small Arms Fire Ground Casualty Undefined Code Invalid Date South Vietnam Quang Nam 1st Mar Div H&S Co 1st Recon Bn BERKELEY Missouri 50W 45
SPAINHOUR WALTER J JR 85876 4/7/1940 Marine Corps First Lieutenant O2 Infantry Officer (USMC) 9/15/1966 9/15/1966 Invalid Date Hostile, Died Gun, Small Arms Fire Ground Casualty Undefined Code Invalid Date South Vietnam Quang Tri 1st Mar Div A Co 5th Recon Bn LENOIR North Carolina 10E 98
SPINUZZI JAMES CARL 1607167 12/7/1940 Marine Corps Corporal E4 Field Radio Operator (USMC) 1/24/1966 1/24/1966 Invalid Date Hostile, Died Other Explosive Device Ground Casualty Undefined Code Invalid Date South Vietnam Quang Tin 1st Mar Div A Co 1st Recon Bn PUEBLO Colorado 04E 85
STARBUCK ROBERT FRENCH 1939063 7/17/1941 Marine Corps Sergeant E5 Infantry Unit Leader (USMC) 2/3/1967 2/4/1967 Invalid Date Hostile, Died of Wounds Other Explosive Device Ground Casualty Undefined Code Invalid Date South Vietnam Quang Ngai 1st Mar Div A Co 1st Recon Bn MONTGOMERY New York 14E 121
STEINBACH THOMAS RAYMOND 2384229 9/1/1947 Marine Corps Lance Corporal E3 Rifleman (USMC) 11/29/1968 11/29/1968 4/21/1968 Hostile, Died Gun, Small Arms Fire Ground Casualty Undefined Code Invalid Date South Vietnam Quang Nam 1st Mar Div B Co 1st Recon Bn TEXAS CITY Texas 37W 4
STENBERG JOHN MARVIN 2430569 9/3/1948 Marine Corps Private First Class E2 Rifleman (USMC) 5/26/1969 5/26/1969 12/28/1968 Hostile, Died Gun, Small Arms Fire Ground Casualty Undefined Code Invalid Date South Vietnam Quang Nam 1st Mar Div A Co 1st Recon Bn INTERNATIONAL FALLS Minnesota 24W 113
STOCKMAN JOHN FRANK 191344673 10/13/1943 Marine Corps Corporal E4 Rifleman (USMC) 11/18/1970 11/18/1970 7/12/1970 Hostile, Died Air Loss, Crash - Land Helicopter - NonCrew Undefined Code Invalid Date South Vietnam Quang Nam 1st Mar Div B Co 1st Recon Bn MARCUS HOOK Pennsylvania 06W 69
STONE LARRY GEORGE 95514 11/15/1941 Marine Corps Second Lieutenant O1 Basic Infantry Officer (USMC) 5/22/1967 5/22/1967 Invalid Date Hostile, Died Gun, Small Arms Fire Ground Casualty Undefined Code Invalid Date South Vietnam Quang Nam 1st Mar Div C Co 1st Recon Bn YERINGTON Nevada 20E 87
STOWE LUTHER TONY 2296163 9/17/1947 Marine Corps Lance Corporal E3 Rifleman (USMC) 7/11/1967 7/11/1967 Invalid Date Non-Hostile, Died of Other Causes Other Causes Ground Casualty Undefined Code Invalid Date South Vietnam Quang Nam 1st Mar Div 1st Force 1st Recon Bn NORTH EDWARDS California 23E 55
TANNEHILL CHARLES DEVEAUX 2068859 8/26/1945 Marine Corps Sergeant E5 Rifleman (USMC) 4/23/1969 4/23/1969 8/14/1968 Hostile, Died Gun, Small Arms Fire Ground Casualty Undefined Code Invalid Date South Vietnam Quang Nam 1st Mar Div B Co 1st Recon Bn JACKSON Mississippi 26W 36
THIBEAULT GILBERT 2368800 4/26/1949 Marine Corps Private First Class E2 Machine Gunner (USMC) 2/29/1968 2/29/1968 11/30/1967 Hostile, Died Artillery, Rocket, Mortar Ground Casualty Undefined Code Invalid Date South Vietnam Thua Thien 1st Mar Div 1st Recon Bn BRISTOL Connecticut 42E 10
THOMAS LARRY EDWARD 2514924 2/6/1947 Marine Corps Private First Class E2 Assaultman (USMC) 5/14/1969 5/14/1969 3/18/1969 Hostile, Died Gun, Small Arms Fire Ground Casualty Undefined Code Invalid Date South Vietnam Quang Nam 1st Mar Div B Co 1st Recon Bn PITTSVILLE Wisconsin 24W 13
THOMPSON JERRALD RICH 1892012 11/5/1941 Marine Corps Corporal E4 Rifleman (USMC) 6/16/1966 6/16/1966 Invalid Date Navy Cross Hostile, Died Gun, Small Arms Fire Ground Casualty Undefined Code Invalid Date South Vietnam Quang Tin Howard's Hill, Hill 55 Nui Vu Hill Mass S of Hiep Duc 1st Mar Div C Co 1st Recon Bn COLUMBUS Ohio 08E 54
TISDALL GARY DEAN 2295987 11/10/1946 Marine Corps Corporal E4 Field Radio Operator (USMC) 7/3/1968 7/3/1968 4/17/1968 Hostile, Died Air Loss, Crash - Land Helicopter - NonCrew Undefined Code Invalid Date South Vietnam Quang Nam 1st Mar Div B Co 1st Recon Bn MODESTO California 53W 6
TORRES-OYOLA ORLANDO 583244831 4/29/1949 Marine Corps Corporal E4 Machine Gunner (USMC) 8/14/1970 11/10/1969 Hostile, Died of Wounds Multiple Fragmentation Wounds Ground Casualty Undefined Code Invalid Date South Vietnam Quang Nam 1st Mar Div A Co 1st Recon Bn CAYEY Puerto Rico 08W 113
TOTTEN RANDY GENE 2073274 5/22/1945 Marine Corps Corporal E4 Undefined Code 5/17/1966 5/17/1966 Invalid Date Hostile, Died Gun, Small Arms Fire Ground Casualty Undefined Code Invalid Date South Vietnam Thua Thien 3rd Mar Div 1st Force 3rd Recon Bn REED CITY Michigan 07E 77
TRACY ROBERT LOUIS B405968 1/1/1947 Navy Hospital Corpsman Third Class (Navy) E4 Hospital Corpsman (NAVY) 1/18/1968 1/18/1968 12/15/1967 Hostile, Died Other Explosive Device Ground Casualty Undefined Code Invalid Date South Vietnam Quang Nam 1st Mar Div 1st Recon Bn GREENVILLE Delaware 34E 72
TUCKER ROBERT EUGENE 513525753 11/12/1948 Marine Corps Lance Corporal E3 Rifleman (USMC) 11/18/1970 11/18/1970 7/21/1970 Hostile, Died Air Loss, Crash - Land Helicopter - NonCrew Undefined Code Invalid Date South Vietnam Quang Nam 1st Mar Div 1st Recon Bn ABBYVILLE Kansas 06W 69
TURNER JAMES LOUIS 2287212 02/07/1946 Marine Corps Corporal E4 Radioman(USMC) 4/26/1968 4/26/1968 11/22/67 Hostile, Died Ground Casualty Undefined Code Undefined Code Invalid Date South Vietnam Quang Nam 1st Mar Div A Co 1st Recon Bn PUEBLO CO. 52E 25
ULSTAD DENNIS ELMER 2120343 9/18/1947 Marine Corps Sergeant E5 Undefined Code 1/26/1969 1/26/1969 1/5/1969 Hostile, Died Drowned, Suffocated Ground Casualty Undefined Code Invalid Date South Vietnam Quang Nam 1st Mar Div E Co 1st Recon Bn BILLINGS Montana 34W 89
URNES JAMES LEE 2483005 7/10/1949 Marine Corps Private First Class E2 Rifleman (USMC) 5/4/1969 5/4/1969 3/8/1969 Hostile, Died Gun, Small Arms Fire Ground Casualty Undefined Code Invalid Date South Vietnam Quang Nam 1st Mar Div D Co 1st Recon Bn PACIFIC GROVE California 25W 3
VALE TONY 2081548 11/10/1944 Marine Corps Private First Class E2 Rifleman (USMC) 11/27/1965 11/27/1965 Invalid Date Hostile, Died Gun, Small Arms Fire Ground Casualty Undefined Code Invalid Date South Vietnam Quang Tin 1st Mar Div C Co 1st Recon Bn HOUSTON Texas 03E 116
VANCE SHERMAN DALE 2305523 12/14/1948 Marine Corps Corporal E4 Rifleman (USMC) 7/3/1968 7/3/1968 12/10/1967 Hostile, Died Air Loss, Crash - Land Helicopter - NonCrew Undefined Code Invalid Date South Vietnam Quang Nam 1st Mar Div B Co 1st Recon Bn WEST POINT Illinois 53W 6
VILLASANA FERNANDO 461902804 11/22/1950 Marine Corps Corporal E4 Rifleman (USMC) 11/18/1970 11/18/1970 1/11/1970 Hostile, Died Air Loss, Crash - Land Helicopter - NonCrew Undefined Code Invalid Date South Vietnam Quang Nam 1st Mar Div 1st Recon Bn EL PASO Texas 06W 70
WALTON CRAIG LESLIE 2120764 1/16/1946 Marine Corps Sergeant E5 Undefined Code 11/7/1968 11/7/1968 8/22/1968 Hostile, Died Other Explosive Device Ground Casualty Undefined Code Invalid Date South Vietnam Quang Nam 1st Mar Div 1st Recon Bn SAN JOSE California 39W 35
WEIDEMIER PETER JOSEPH 2387354 11/26/1947 Marine Corps Private First Class E2 Rifleman (USMC) 6/3/1968 6/3/1968 3/24/1968 Hostile, Died Other Explosive Device Ground Casualty Undefined Code Invalid Date South Vietnam Quang Nam 1st Mar Div B Co 1st Recon Bn ALAMEDA California 60W 7
WEIL RICHARD ANTHONY JR 2408265 5/22/1949 Marine Corps Lance Corporal E3 Rifleman (USMC) 6/21/1969 6/21/1969 4/5/1969 Hostile, Died Air Loss, Crash - Land Helicopter - NonCrew Undefined Code Invalid Date South Vietnam Quang Nam 1st Mar Div D Co 1st Recon Bn ANAHEIM California 22W 110
WESTERGARD TERRY MICHAEL 2376475 10/6/1948 Marine Corps Lance Corporal E3 Mortarman (USMC) 11/12/1968 11/12/1968 11/23/1967 Non-Hostile, Died of Other Causes Other Accident Ground Casualty Undefined Code Invalid Date South Vietnam Quang Nam 1st Mar Div C Co 1st Recon Bn IRETON Iowa 39W 57
WHELCHEL RUSSELL DESMOND 2311853 7/19/1947 Marine Corps Lance Corporal E3 Rifleman (USMC) 9/7/1967 9/7/1967 Invalid Date Hostile, Died Gun, Small Arms Fire Ground Casualty Undefined Code Invalid Date South Vietnam Quang Nam 1st Mar Div 1st Force 1st Recon Bn LIBERAL Kansas 26E 33
WHITLOCK THEODORE JAY 2411884 11/21/1948 Marine Corps Private First Class E2 Rifleman (USMC) 8/1/1968 8/1/1968 Invalid Date Hostile, Died Gun, Small Arms Fire Ground Casualty Undefined Code Invalid Date South Vietnam Quang Nam 1st Mar Div E Co 1st Recon Bn NORTH LAS VEGAS Nevada 50W 46
WIKANDER DAVID JOSEPH 300346671 7/8/1942 Marine Corps Sergeant E5 Rifleman (USMC) 6/25/1970 6/25/1970 5/27/1970 Non-Hostile, Died of Other Causes Other Causes Ground Casualty Undefined Code Invalid Date South Vietnam Quang Nam 1st Mar Div 1st Recon Bn CALDWELL Ohio 09W 92
WILKERSON DAVID HUNTER 2457835 12/8/1949 Marine Corps Private First Class E2 Rifleman (USMC) 5/20/1969 5/20/1969 2/14/1969 Non-Hostile, Died of Other Causes Other Causes Ground Casualty Undefined Code Invalid Date South Vietnam Quang Nam 1st Mar Div A Co 1st Recon Bn DAVENPORT Iowa 24W 63
WILLIAMS RONALD ANTHONY 2236072 10/16/1946 Marine Corps Lance Corporal E3 Rifleman (USMC) 6/7/1967 Invalid Date Hostile, Died of Wounds Gun, Small Arms Fire Ground Casualty Undefined Code Invalid Date South Vietnam Quang Tin 1st Mar Div 1st Force 1st Recon Bn GREENVILLE South Carolina 21E 72
WILLIS JAMES RONALD 2127524 9/14/1947 Marine Corps Corporal E4 Rifleman (USMC) 8/1/1968 8/1/1968 2/23/1968 Hostile, Died Gun, Small Arms Fire Ground Casualty Undefined Code Invalid Date South Vietnam Quang Nam 1st Mar Div B Co 1st Recon Bn CARSON CITY Nevada 50W 43
WINTERS DANIEL EARL 2384457 10/19/1948 Marine Corps Private First Class E2 Rifleman (USMC) 10/8/1968 5/17/1968 Non-Hostile, Died of Illness/Injury Burns Ground Casualty Undefined Code Invalid Date South Vietnam Quang Nam 1st Mar Div E Co 1st Recon Bn BRIDGE CITY Texas 41W 33
WORREL THOMAS DUANE 311565545 2/12/1950 Marine Corps Lance Corporal E3 Rifleman (USMC) 4/23/1970 4/23/1970 7/9/1969 Hostile, Died Gun, Small Arms Fire Ground Casualty Undefined Code Invalid Date South Vietnam Quang Nam 1st Mar Div A Co 1st Recon Bn ROANOKE Indiana 11W 42
YANCEY CRAIG MARTIN 446482479 12/2/1950 Marine Corps Private E1 Rifleman (USMC) 5/19/1970 5/19/1970 1/11/1970 Hostile, Died Air Loss, Crash - Land Helicopter - NonCrew Undefined Code Invalid Date South Vietnam Quang Nam 1st Mar Div C Co 1st Recon Bn TULSA Oklahoma 10W 68
YATES RICHARD WOODROW 423668737 5/29/1950 Navy Hospitalman (Navy) E3 Undefined Code 10/22/1969 10/22/1969 9/15/1969 Hostile, Died Gun, Small Arms Fire Ground Casualty Undefined Code Invalid Date South Vietnam Quang Nam 1st Mar Div C Co 1st Recon Bn QUANTICO Virginia 17W 107
ANDERSON, GREGORY
B, C, AND H&S 9/75 - 6/77, 6/78 - 6/79, 5/83 - 5/88
glanderson768@aol.com
ANDERSON, JERALD
H&S COMM JAN. 62 - NOV. 63
janderson672@gmail.com
ANDREWS, MICHAEL
H&S DEC. 66- SEPT. 67
mike5711@sbcglobal.net
ANGELE, ALFRED
JULY 61 TO OCT. 62
alangele@aol.com
APGAR, DAVID
DELTA 1ST PLT./H&S 12/66 TO 8/67
pdap@ptdprolog.net
ARMSTRONG, STEVEN
BRAVO AND H&S MARCH 68 - JUNE 69
madhatter5555@clear.net
AUSTIN, JIM
ALPHA AND H&S 77/81
jma@plateautel.net
AVERY, DAN
H&S 67/68
Davery1948@mail.com
BAAS, JOHN
H&S/FORCE MAY 67 - JAN 1969
jkbaas@wideopenwest.com
BAILEY, RICHARD
DELTA & H&S 04/67 - 05/68
baileywire@yahoo.com
BARANOWSKI, JAMES
H&S 06 - 08
eddycanadian@hotmail.com
BARENTINE, JERROD
H&S DIVE LOCKER JULY 03 - PRESENT
jlbarentine001@yahoo.com
BARRERA, RICHARD
CHARLIE AND H&S 6/75 - 1/79
specwarrior@hotmail.com
BEAMAN, STEVEN
H&S JUNE 67 - JUNE 68
BeamanSteven@bfusa.com
BEAVERS, CHARLES
H&S 04 - PRESENT
Spike6770@yahoo.com
BELL, DONALD
ALPHA AND H&S NOV. 79 - JUNE 71
dgordonbell@gmail.com
BENEDICT, JAMES
H&S/DELTA JULY 1968 - AUG 1969
BENEZE, GARY
CHARLIE CO. & H&S 68/69
garybeneze@cableone.net
BENNETT, MICHAEL
H&S & 1ST FORCE 12/68 - 1/70
mben455620@aol.com
BENSON, WILLIAM
H&S 81/82
bingyum@yahoo.com
BLISS, FREDRICK
H&S COMM 80/83
fbliss@roarrunner.com
BORLAND, STEVE
H&S APRIL 61 - SEPT. 62
smborland@comcast.net
BRENNAN_ JR., VINCENT
FO ATTACHED MAD HATTER 1967-68
BRINK, MICHAEL
H&S 4/27/01 - 2/11/05
MR_Brink@msn.com
BRISTOW, NICK
CHARLIE CO. & H&S 84/87
nbristow01@yahoo.com
BROOKS, JASON
H&S 01/01 - 06/05
jmb32usmcret@yahoo.com
BROOKS, JASON
H&S 01/01 - 06/05
jmb32usmcret@yahoo.com
BROWN, TERRY L
H&S SUPPLY 06 - PRESENT
tjbrown2006_2010@yahoo.com
BRYSON, MICHAELL
ALPHA & H&S JUNE 05 - MAY - 08
michael.bryson12@yahoo.com
BUATTE, DONALD
H&S/ALFA CO. FEB.66- JAN.67
BUDAY, GARRY E
ECHO AND H&S MISSION IMPOSSIBLE69/70
garybedouinshrine@gmail.com
BURNS, ROY L
BRAVO, H&S, & 1ST FORCE 2/65 - 2/66
tyros2@aol.com
BUSH, JEFFERY L
CHARLIE AND H&S 74/75 AND 86/87
jeffery.bush@waters.nestle.com
BUSSEY, JAMES L
H&S MOTOR T DISPATCHER 12/67 - 10/69
jlb8361@juno.com
CALVERT, JOHN W
H&S JAN. 59 - MARCH 60
jwwcmbv@aol.com
CALVERT, R.D. "BUTCH"
DELTA 3RD PLT. & H&S 7/66 - 9/67
rdcbutch@aol.com
CAREY_ MD HOWARD
BAS H&S JUNE 2000 - TO PRESENT
CARUSO, ROBERT
H&S AND BRAVO 78/80
rcarusolk@netscape.net
CHANG, PAUL
H&S 91/93
pchang@lmi.org
CHICK, ROBERT
ALPHA/MOTOR POOL 65/66
chickbln@aol.com
CHRISTIANSEN, AXEL
H&S 9/68 - 1/69
axelc@cox.net
CLARK, JEREMIAH
H&S OCT. 1, 08 - APRIL 30, O8
clarkjeremiah34@yahoo.com
CLAXTON, GEOFFREY
12/12/66 - 12/22/67
gclaxton@banta.com
CLIFFORD, PAUL
MAY 2010 - JULY 2012
paul.clifford@usmc.mil
COLE, JAMES
ECHO CO. & S-2 JUNE 69 - JULY 70
buzurdluk@frontier.net
COLLINS, MICHAEL
H&S 5/70 - 8/70
mcollins1015@sbcglobal.net
COMPTON, KENNETH,
H&S 8/74 - 7/75
Ordicus@midrivers.com
CONANT, DANIEL
H&S 2/68 - 10/69
dconant1@cox.net
CORRADO, DOMINICK
H&S/1ST FORCE JAN.66- OCT.67
CORZINE, THOMAS
H&S 2/00 - 2/O2
tom.corzine@gmail.com
COTTON, PATRICK
H&S S-4 10/73 - 6/74
txcotton55@yahoo.com
DANIEL, KENNETH
H&S & CHARLIE 85/87
danielkenneth48@yahoo.com
DAUDT, GARRETT
H&S 63
garrettdaudt@hotmail.com
DEMMERY, DEAN
DELTA CO. 64/ 65 & H&S 65/ JULY 66
ddemmery@carolina.rr.com
DILL, ERIC
A, B, C, D, & H&S 05 - PRESENT
ectdill@aol.com
DILLON, GREGORY
H&S 7/84 - 7/86
gdillonn@aol.com
DOBSON, PAUL
H&S DEC. 67 - MARCH 69
coloneldusmc@bellsouth.net
DORAN, JEFF _DOC_
HQ 7TH/8TH PLATOONS RECON CO APRIL 1998 - JANUARY 2000
DUDAS, FRANK
BRAVO, CHARLIE, AND H&S 81/83
testdiver60@yahoo.com
DUNN, JOHN
BRAVO CO./H&S JULY 66- AUG. 67 COMPANY COMMANDER
john.dunn8@worldnet.att.net
DUNNICK, EVERETT W
H&S OPS O AND XO JUNE 00/02
everett.dunnick@gmail.com
DUNNING,CLIFFORD
H&S 8/71 - 8/72
crdunning@aol.com
EGGLESTON, D.M. (MIKE)
H&S CO. JUNE 61 - FEBRUARY 62
EFAW, CARY
H&S CO. JUNE 70 - JANUARY 71
ESTRADA, RAMON
H&S SEPTEMBER 68- DEC. 69
FARQUHARSON, JAMES
H&S BN. S-3 CHIEF 77 - 80
grunt036986548511@yahoo.com
FARRELL, WALTER C. (CHUCK)
H&S 79/84
1recon@bellsouth.net
FERREIRA, PAUL
H&S 11 NOV. 70 - 12 MAY 71
shakey231@aol.com
FAIRCLOTH, SAMUEL
H&S 88/91
onebigape@yahoo.com
FISHER, STEVE
H&S CO. MARCH 68 - MARCH 69
reconnam@hotmail.com
FLORENTINE, GERARD
ALPHA AND H&S 67/69
gcf_kyoto88@yahoo.com
FOLEY, ALBERT
H&S / BRAVO MAR 1970- JUNE 73 RETIRED 2OYRS GUNNY SGT
FONTANE, RUDOLPH
H&S DEC. 65 - MARCH 66
rfontane@gmail.com
FREEMAN, WILLIAM
H&S 70/71
wildbillpam@charter.net
FREDERICKS, STEVEN
CHARLIE CO. & H&S 04 TO PRESENT
frederickssj@gcemnf-wiraq.usmc.mil
FUSSELL, THOMAS
H&S 71/74
moorefive@embarqmail.com
GARCIA, EDWARD
CHARLIE CO. & H&S 4/92 - 5/94
edanpatgarcia@aol.com
GADDIS, JOHN
H&S 60 - 62
gadd3883@bellsouth.net
GEFFKEN, JAMES
H&S / DELTA JAN. 67 - MARCH 68
GENNARI, JOSHUA
ALPHA & H&S JAN. 01 - OCT. 03
gennarijj@gmail.com
GILMAN, BRIAN
H&S AND CHARLIE 6/2001 - 6/2005 & 1/2011 - 6/2012
brian.l.gilman@gmail.com
GRAVES, DAVID
COMM PLT. 75 TO EARLY 76 THEN WENT TO BRAVO
WHEN IT WAS REACTIVATED UNTIL JAN. 77 ALPHA 79/81
DGraves195@aol.com
GREENBERG, RICHARD
ALPHA & H&S 69/70
greenrzilla@gmail.com
GRIFFIN, GERALD
H&S CO. JAN 69/70
wgri1050@bellsouth.net
GRIFFITH, DONALD
H&S CO. JAN 64 - AUGUST 66
griffithusmc@msn.com
HALL, RICHARD
H&S CO. DEC. 94 - DEC. 85
protection42@comcast.net
HANLEY, NEAL
H&S CO MARCH 1982 - JULY 1984
neal_hanley@yahoo.com
HARE, JOHN
H&S NOV.69-NOV.70
HASSELTINE, GEORGE
H&S 6/14 - PRESENT
gdh13@yahoo.com
HAY JR, SAMUEL
H&S JAN 1971 - MARCH 1971
usmcbunker@neo.rr.com
HEAD, ALLEN
H&S APRIL 88 - OCT. 89
reconsix87@hotmail.com
HEARN, NORMAN
H&S CO JANUARY 1971 - JUNE 1971 RADIO-TELEGRAPH OPERATOR 2533
HECKER, JAMES
BAS THEN 1ST FORCE
bones360@live.com
HICKLIN, ROGER,
CHARLIE & H&S 3/3/73 - 1/8/75
rogerjuju@yahoo.com
HICKS, FRANK
ALPHA/CHARLIE/H&S 71-73 1976-1978 COMMANDING OFFICER
hicksfw@prodigy.net
HIGGINS, BEAU
H&S 06 - 08 COMMANDING OFFICER
bhiggins_2000@yahoo.com
HILL, JOHN
H&S CO OCT 1966- OCT 1967
HILTON JR., CHARLES
H&S_A_C CO.
Misfitbulldog@aol.com
HOFMANN_ JR GEORGE
H&S CO. APR 1981- JULY 1983
HOGG, GORDON
H&S COMM. 82/85
gshogg@yahoo.com
HOLEWINSKI, KYLE
H&S COMM. 86/89
jholewinski4@new.rr.com
HOWDYSHELL JR., CHARLES
H&S SECURITY APRIL 67 TO JULY 67
howdy.usmc@live.com
HOWLAND, JOHN (CREG)
ALPHA & H&S JAN. 69 TO APRIL 70
jchowland@verizon.net
HUDDLESTON, GENE
3RD RECON ATTACHED TO 1ST Recon H&S 1/66 - 3/66
gkhud@cfl.rr.com
HUDSON, JOHN
BRAVO, CHARLIE, & H&S 675 - 6/79
GitSum@gmail.com
HUGHES, RICHARD
JAN. 84 - JUNE 85
rhughesmarines88@comcast.net
HUNT, JAMES
CHARLIE CO. JULY 70 - APRIL 71
jimhunt989@charter.net
HUSING, DAVID
1ST RECON CO., ALPHA, BRAVO, CHARLIE, AND H&S 94 - 00 AND 04 - 08
Hammer8654@cox.net
JAUNAL JACK
H&S CO. APRIL 68 - DEC. 68 BATTALION SERGEANT MAJOR
JIRKA, PATRICK
BRAVO 91/97 AND H & S 2002 - 2004
reconpj@yahoo.com
JONES, LAWRENCE
H&S 59/60
schoonercaptain@netscape.net
JONES, WILLIAM
H&S CO. AUGUST 69 - AUGUST 70
JORDAN, JAY
H&S COMM. 84/87
Jordanjayt@gmail.com
KALLIN, BENJAMIN
H&S, SECURITY/PSD
benjaminjkallin@gmail.com
KARK, FRANK
H&S / FORCE FEB. 68 - MARCH 69
KING, GARY
ALPHA, CHARLIE, & H&S 72 -74
platoesq@alaska.net
KITCHEN, VERNON
H&S CO SEPT 1962 - FEB 1964 COMMUNICATION PLATOON
KOLLMORGAN, ANTHONY
H&S CO. SEPT. 2000 - FEB. 04 S-4 LOG CHIEF
tkollmorgan@cox.net
KOWALEWSKI, STANLEY
H&S CO. JAN 1971 - JAN 1973 COOK
sfkow36@hotmail.com
KRAEMER, WALTER
H&S COMM 2/78 - 3/79
wkraemer@cswg.com
LADE, JEFFERY
H&S 83 - 85
ladebackmusic@yahoo.com
LA TOUR, STEVEN
H&S CO. APRIL 1968 - APRIL 1969
slatour@d.umn.edu
LARKINS, EDWARD
H&S CO. SEPT. 99 - NOV. 02
elarkins1@cox.net
LARSON, CHARLIE
H&S CO. AUG 1968 - MARCH 1970
calarson48@gmail.com
LARSON, CURTIS
H&S CO. 81/85
curtis.larson@mchsi.com
LATTRAY, LOUIS
H&S CO. APRIL 69 - MAY 1970
klattray4371@sbcglobal.net
LAURITZEN, RONALD
H&S CO NOV 1958 - JUNE 1961
rlaurit@gmail.com
LAVELLE, REYNALDO
H&S SEPT 1975 - OCT 1976
LEDERER, BORIS
CHARLIE, H&S, & DRP 83/86 & 89/92
Blederer@mac.com
LEE, JEFFREY
BRAVO & H&S 9/89-11/90
jlnra@cableone.net
LEFORT, MICHAEL
H&S 1976 - 77
mlefort@kc.rr.com
LEHMAN, ROBER (GIG)
H&S 05/06
rfl109@yahoo.com
LEWIS, LEON (GIG)
AUG. 68 TO NOV.69
giglewis42@gmail.com
LEHMAN, ROBER (GIG)
H&S 05/06
rfl109@yahoo.com
LINGMAN, DANIEL
H&S CO. MARCH 2001 - MAY 2002 AIR OFFICER / S-3
LoGIUDICE, MICHAEL
BRAVO CO/RECON CO. HQ BN NOV 1990 - MARCH 1997
drlogiudice@gmail.com
LOSSON, DON
ALPHA, CHARLIE, & H&S 2/73 - 4/71
jlosson@cox.net
LOTT, WALTER D.
ALPHA, BRAVO & H&S MARCH 26, 66 - OCT. 26, 66
davelott67@gmail.com
LUTZ JR., ROBERT
H&S CO. MARCH 1985 - MARCH 88
rwljr2@msn.com
LOVEJOY ll, OWEN
H&S CO. & CHARLIE DEC. 90 - NOV. 91
owen.lovejoy@tampabay.rr.com
LOWE, TERRY
ALPHA AND H&S 74/76
tloweinkosovo@msn.com
MAHACEK, JIM
H&S 9/70 - 4/72
jmahacek@gmail.com
MANION, TOM
H&S INTELLIGENCE
tmanion@neo.rr.com
MARCAYDA, HECTOR
H&S BN. XO 00/01
marcayda3@comcast.net
MARSHALL, GARY
DELTA/H&S APR.69 -MARCH 70 TEAM: HANOVER SUE
marshallgs@yahoo.com
MARTIN, WILLIAM
H&S NOV. 57 - APRIL 59
billnpatti1@verizon.net
MARZINSKY, MICHAEL
H&S 1/90 - 4/93
marzusmc@verizon.net
MASON, ROBERT
H&S MOTOR T DEC 1970 -MARCH 72
reconmotort6872@yahoo.com
MAXFIELD, DANA S
H&S 82 - 84
dana@maxfield.com
MC ANDREWS, EDWARD
H&S/FORCE OCTOBER 69-NOV. 69
McBRIDE, WILLIAM
H&S 60/61
bill@vietvet.org
McCAUSLAND, THOMAS
DELTA 66/67 TEAM DUCKBILL & H&S 70/71
tommcc@frontiernet.net
McCONAGHY, ROBERT
H&S COMM SEC / 1ST FORCE
McELHANY, DAVID
H&S 68
macmcelhany@msn.com
McLEOD, BRANT
H&S 7/85 - 12/87
Smokeater76@hotmail.com
MC MANUS, MICHAEL
DELTA CO MAR.1965-APR.66 FEBRUARY 68-MARCH 69 ALFA CO. & H&S CO.
mmcmanus2128@gmail.com
MELSON, CHARLES
H&S 81/82
melsoncj@verizon.net
MEYERS, WILLIAM
H&S C.O. & CHARLIE C.O. JULY 84 TO AUG. 86
wemeyers@earthlink.net
MINDER, THOMAS
A, B, C, DRP, & H&S 77/87
t.minder@cox.net
MOORE,TERRY
DELTA, ECHO, & H&S 70-71
TMOORE14@ec.rr.com
MORAN, BRIAN
H&S JULY 70 - FEB. 71
brianlorim@aol.com
MORIN, (CHIP) CHARLES
A, B, & H&S SEPT. 70 - AUG. 72
reconpatriot@verizon.net
MORIN, NICHOLAS
FEB. 02- COMM CHIEF
njmorin8654@gmail.com
MULLEN, ALBERT
H&S/ALFA NOV 71 - MAY 71
amullen@entermail.net
NAY, MAURICE
H&S BN. S-4 CHIEF 73/74
allen@losps.com
NOBLES, RICHARD
BRAVO 6/68 - 6/69 NAM AND CHARLIE 7/69 - 9/70 CA.
rnobles93@gmail.com
OPPENHEIN, CLIFTON
H&S CO JAN 1970 - MARCH 1971 TECH SHOP REPAIRED THE RADIOS
clifton67gm@msn.com
ORSEN, JOE
BRAVO & H&S 6/61- 8/62
joeorsen@stny.rr.com
ORR, RONALD
H&S MOTOR T 72/76
orrmls@hotmail.com
OSTERMAN, ANTHONY
ALPHA, CHARLIE, & H&S JAN. 81 - SEPT. 83
PAFFRATH, KARL
H&S MOTOR/T 81/82
kkpaffrath@rocketmail.com
PALMER, JOE
H&S & BRAVO 10/58 - 4/62
jgpgmp@earthlink.net
PEROT, JAMES _JIM_
H&S / DELTA SEPT. 66 - OCT. 67 Gunny's Gladiators 3rd Platoon
PETERMAN, JOHN
H&S COMM APRIL 65 TO JUNE 67
Skp1149@aol.com
PETERS, JOE
H&S S-4 76/78
joe_peters_ii@hotmail.com
PHILLIPS, JACK
H&S CO. JUNE 68 - SEPT. 68 BATTALION CHAPLAIN
PLASOLA, JESSE
H&S 86/87
jplasola@yahoo.com
PLOUGH II, KENNETH
BRAVO & H&S JAN. 76 - JUNE 79
kplough@pausd.org
PALMER, KALEB
1ST RECON CO. 4TH PLT. & H&S MARCH 97 - JULY 2000
livefast78@yahoo.com
PRINCE, PHILLIP
C.O. OF BRAVO, CARLIE, & H&S 11/70 - 10/72 C.O. 1ST FORCE 10/72 - 7/73
spprince22@msn.com
QUINN, MICHAEL
H&S 79/82
micq99@yahoo.com
RANADOLPH, BRIAN
H&S COMM DEC. 81 - MARCH 83
wasol22463@hotmail.com
RAGO, FRANK
H&S MOTOR T 82/84
realmen@mindspring.com
RAMPA, JASON
H&S 09 (PRESENT)
jason.rampa@ymail.com
REASONER, JAMES M
H&S CO. 67/68
jreas@comcast.net
REDTFELDT, THOMAS M
CHARLIE & H&S CO. 7/74 - 7/77
ctred45@clearwire.net
REGALOT, RENE
H&S/DELTA NOV 1969 - NOV 1970
rregalot@san.rr.com
ROBERTS, DONALD
H&S CO. JUNE 65 - SEPTEMBER 66 NICKNAME WAS: ROBBIE
robertscd@infowest.com
ROBINSON, HENREY (DOC)
BN. AID STATION 68/69
gvsmktng@aol.com
ROGERS, TERRANCE
H&S s-4 87/89
tmrogers62@gmail.com
ROHLFFS, DUKE
H&S 2/1958 to 4/1959
dukecher@cascadeaccess.com
ROTH, RON
H&S MAY 66 TO FEB. 67
x.jarhead@verizon.net
RUDOLPH, FRANCIS
H&S CO APRIL 1969 - MARCH 1970 BATTALION SUPPLY
RUSLING, ROBERT
H&S CO. DECEMBER 59 - DEC. 61
SABATINO, GERALD
H&S CO DEC 1990 - JUNE 1991 COMBAT ARTIST
SCHMIDT, RICHARD J.
CHARLIE, DELTA, HQ, & BN. XO NOV. 07 - PRESENT
schmidtrj@yahoo.com
SCHNEIDER, MICHAEL
H&S, BRAVO, CHARLIE CO. 10/69 - 12/1970
mjschneider63@tx.rr.com
SCHNORR, MICKEY
H&S 04/92 - 12/92
Mickthepa@aol.com
SHANLEY, CHRISTOPHER
H&S S-3 AUG. 85 - AUG. 86
honor@wings-and-things.com
SIMPSON, PETER
H&S 70/71
psboatbuilder@yahoo.com
SKINNER, CHARLES
H&S 11/69 - 6/70
cwski@comcast.net
SMALENBERG, TODD
ALPHA, B, H&S 88 - 92 03 - 05
slyfox0321@aol.com
SMOOT, RANDALL
H&S FEB.69 - SEPT. 70
smooterj@cox.net
SNOWDEN, HOWARD
H&S 72/73
STAPLES, GARY
H&S APRIL 69 - MARCH 70
usmcreconbat@yahoo.com
STAPLES, JONATHAN
H&S JUNE 90 - APRIL 93
voodoochild89029@yahoo.com
ST CLAIR, EDWARD _MIKE_
ALPHA/BRAVO/H&S S-2 64 - 67
estclai1@san.rr.com
ST CLAIR, MICHAEL L
S-2 JUNE 84 - JUNE 85
majormike88@hotmail.com
STEVENSON, DOUGLAS
JAN. 68 - SEPT. 68
doug.stevenson@sbcglobal.net
STEPLOCK, CARL L
CHARLIE CO & H&S AUG. 72 - JUNE 74
clsteplock@spadata.com
STRONG, MATTHEW L
H&S JAN. 06 - JULY 07
strongma@gmail.com
STULL, LINCOLN
H&S 64/65
redrocklink@sc.rr.com
SWIFT, STEVE
ALPHA & H&S 74 - 78
swift1956@yahoo.com
SWIGER, DAVID
H&S AND 1ST FORCE MARCH 72 - DEC. 73
deswiger@yahoo.com
TIBBITT, JOHN
H&S May 68 - Dec 69
jtippitt@avion-specialist.com
TURNER, RODGER
1ST FORCE 5/98 - 9/05, 1ST RECON H&S 8/05 - 6/ 06, THEN BRAVO CO. 6/06 - PRESENT
ritalinrodg@hotmail.com
TURPIN, DANIEL
BRAVO/H&S MARCH 70-JUNE 71
saddlebag6@hotmail.com
UNDERWOOD, RAY
H&S CO. SEPT. 68 - MAY 69
mjunderwood@hotmail.com
VALEZ, WILFREDO
H&S, DELTA MARCH 70 - SEPT 70
VAN HOOSER, DAVID
ALPHA_ECHO_H&S FEB.68-NOV.69 GRIM REAPER
davidectr@aol.com
VINCENT, RANDY
H&S COMM 9/86 - 10/87
WALSH, GREGORY
ALPHA & H&S 73/74
piperthor at gmail.com
WATT, RONALD
H&S 06 - PRESENT
dwatt@usos.com
WEBER JR, ARTHUR
A_B_H&S JULY 1968 - JULY 1969 COLONEL RETIRED
vikings43@cox.net
WENDT, RICHARD
H&S CO. OCTOBER 74-MARCH 75
WHELAN, JEFFREY
5TH RECON 68 THEN DELTA & H&S 68/69 H&S 73/75
jcw784@yahoo.com
WHITMIRE, JOSEPH
CHARLIE & H&S MARCH 69 - FEB. 70
relic462@gmail.com
WIKERSON, IRA DAVID
H&S CO. 68/69
chappyvfw@comcast.net
WILLIAMS, DANNY
H&S/CHARLIE MAY 1970 - MAY 1970
WILLIAMS, JAMES
H&S S-2 SEPT. 66 TO SEPT. 67
WILLIAMSON, MARK T
CHARLIE/H&S 2/69 - 10/70
:williesam@alliancecom.net
WILSON, JOHN
ALPHA, CHARLIE, H&S 91/93
jswilson87106@yahoo.com
WITKIN, RALPH
H&S 11/69 - 11/70
WitkinR@gmail.com


Association of the Natural Warrior

Last Update: May 16th, 2024 - 1:35 PM
PHOTOS


Gallery 3


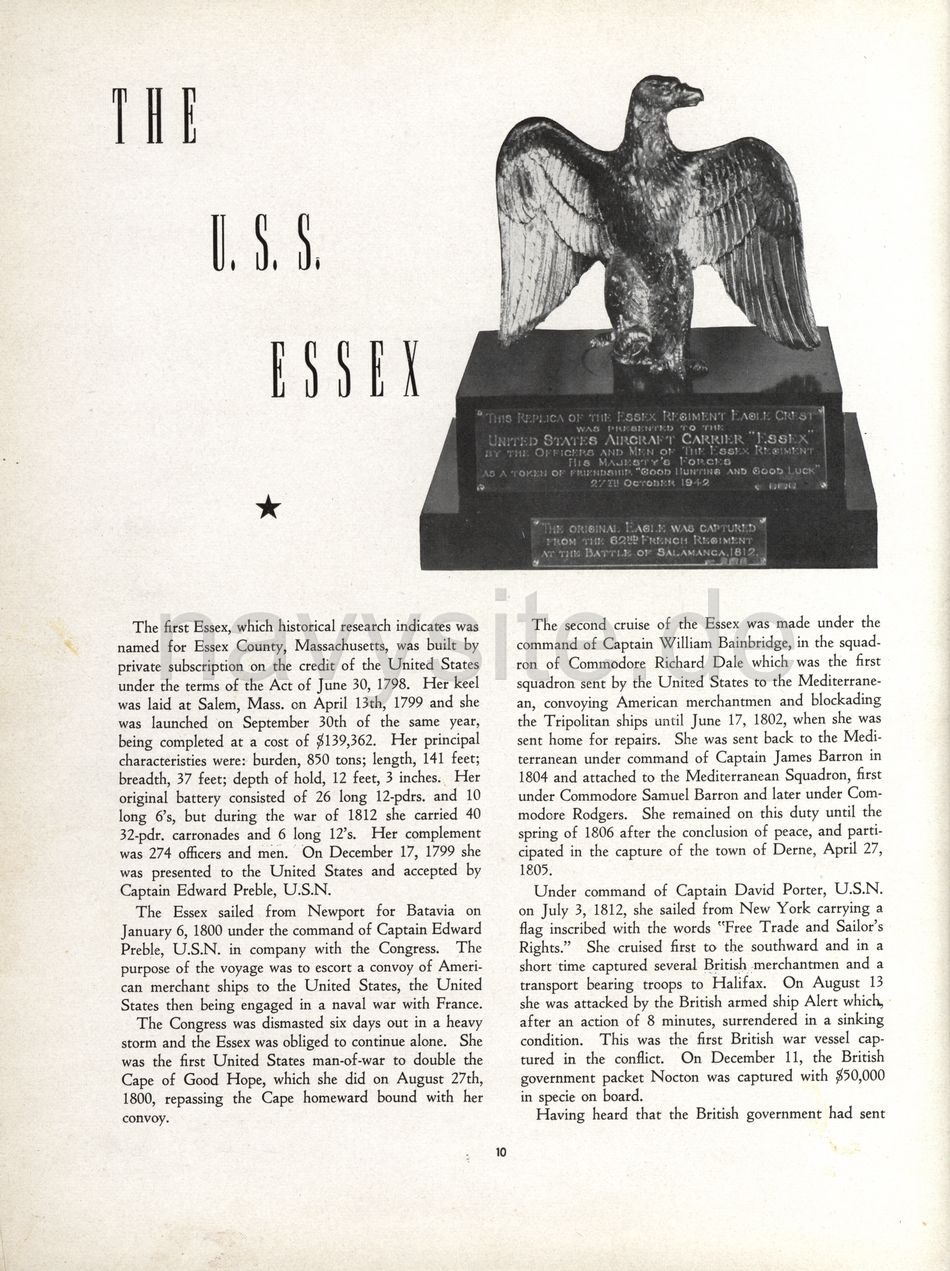
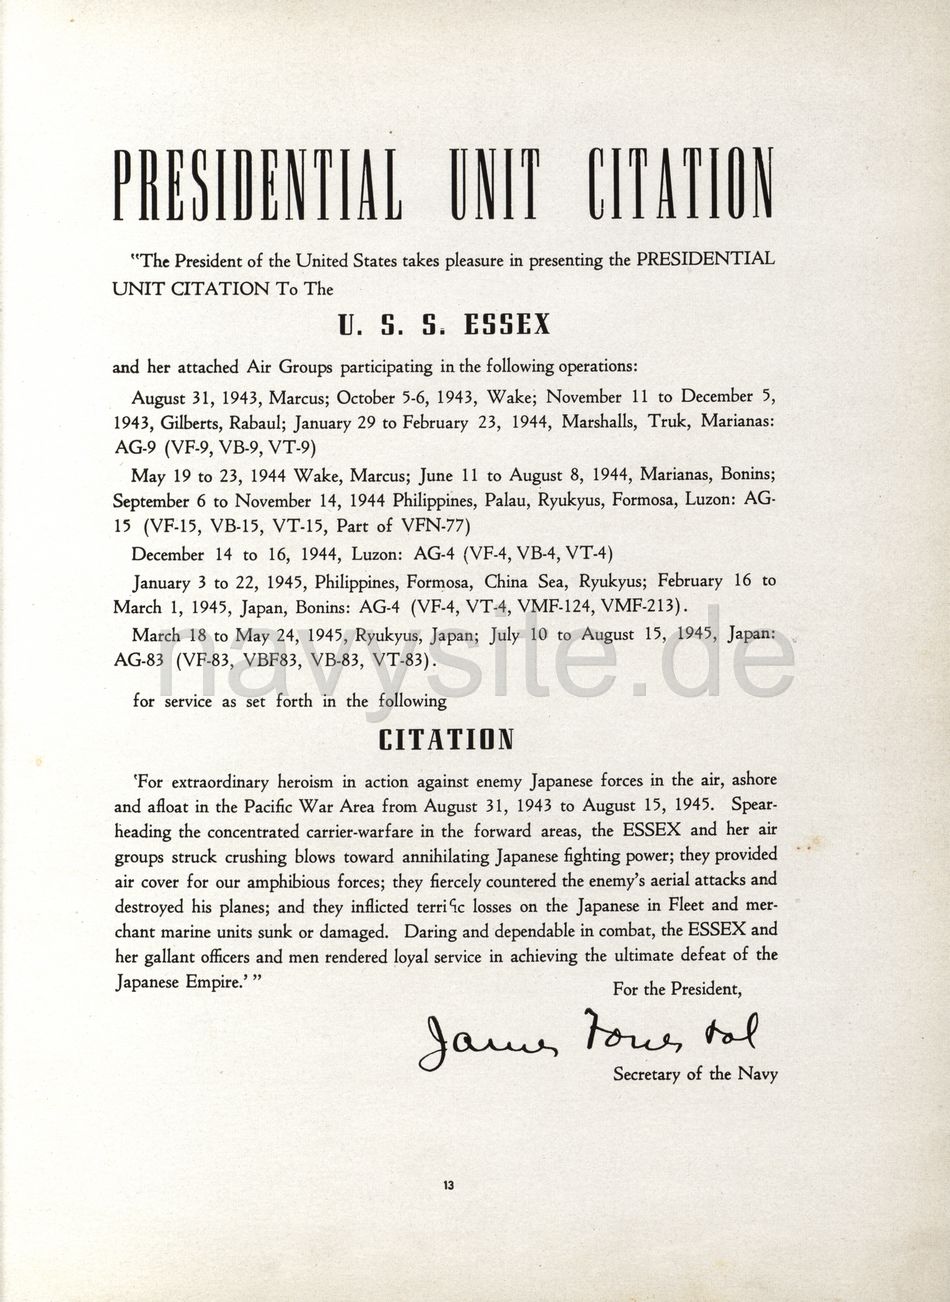


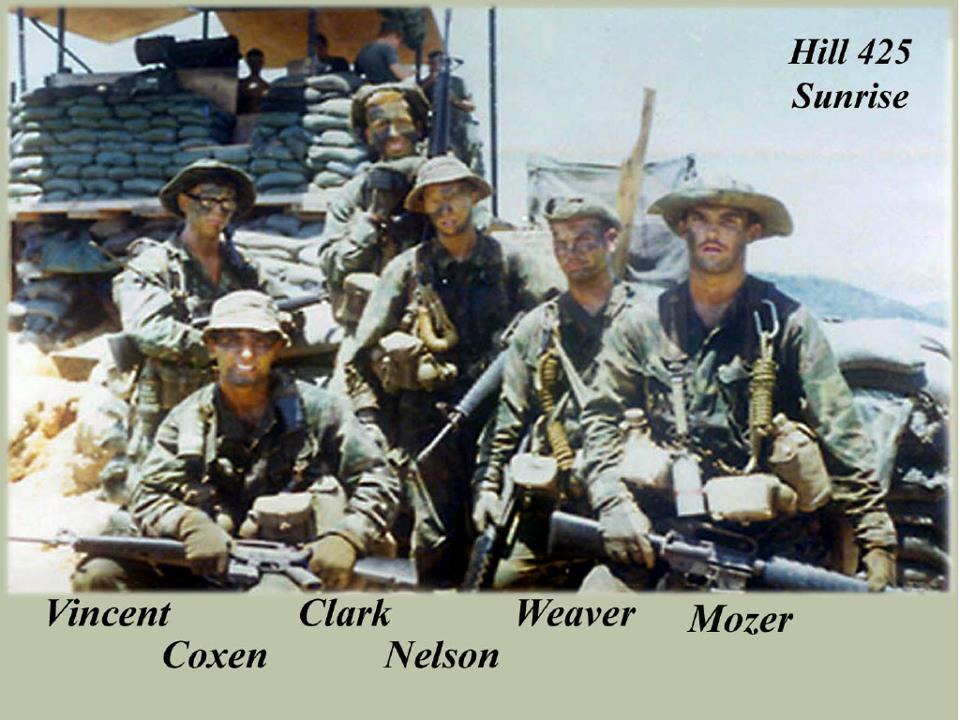
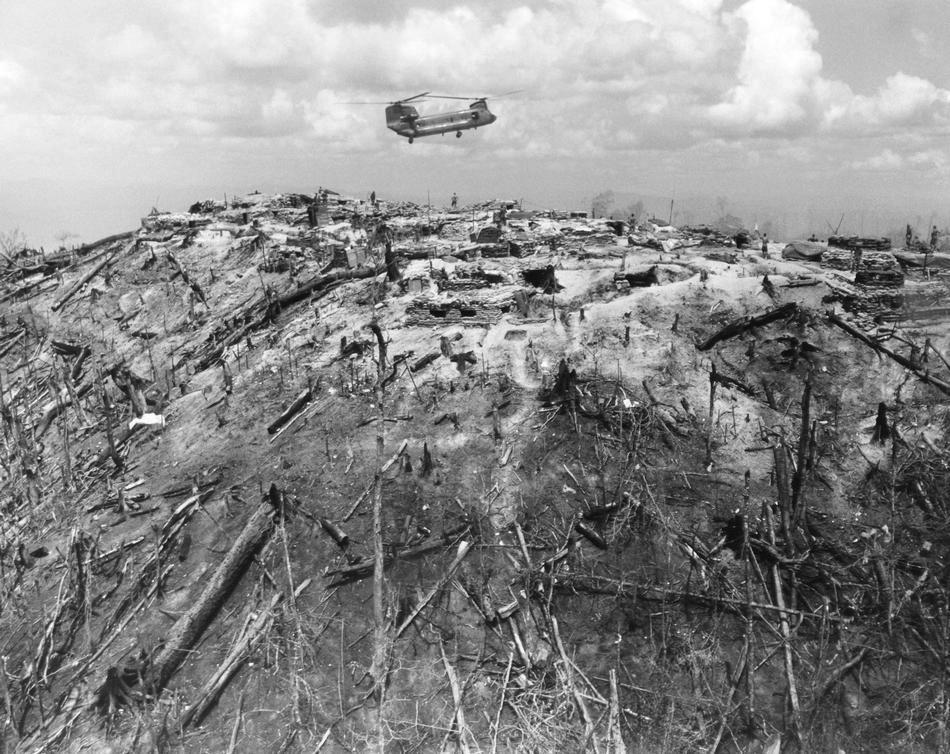
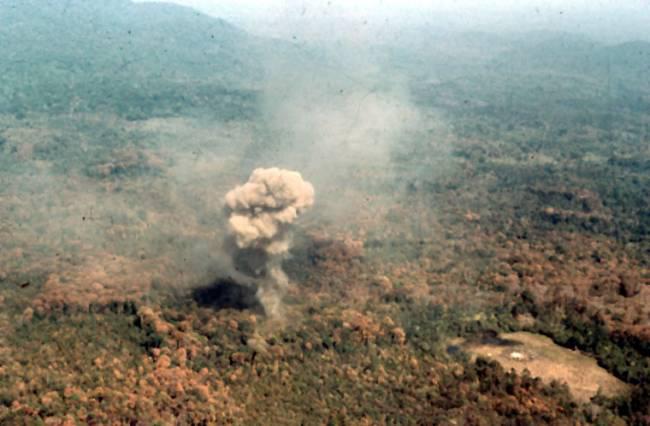
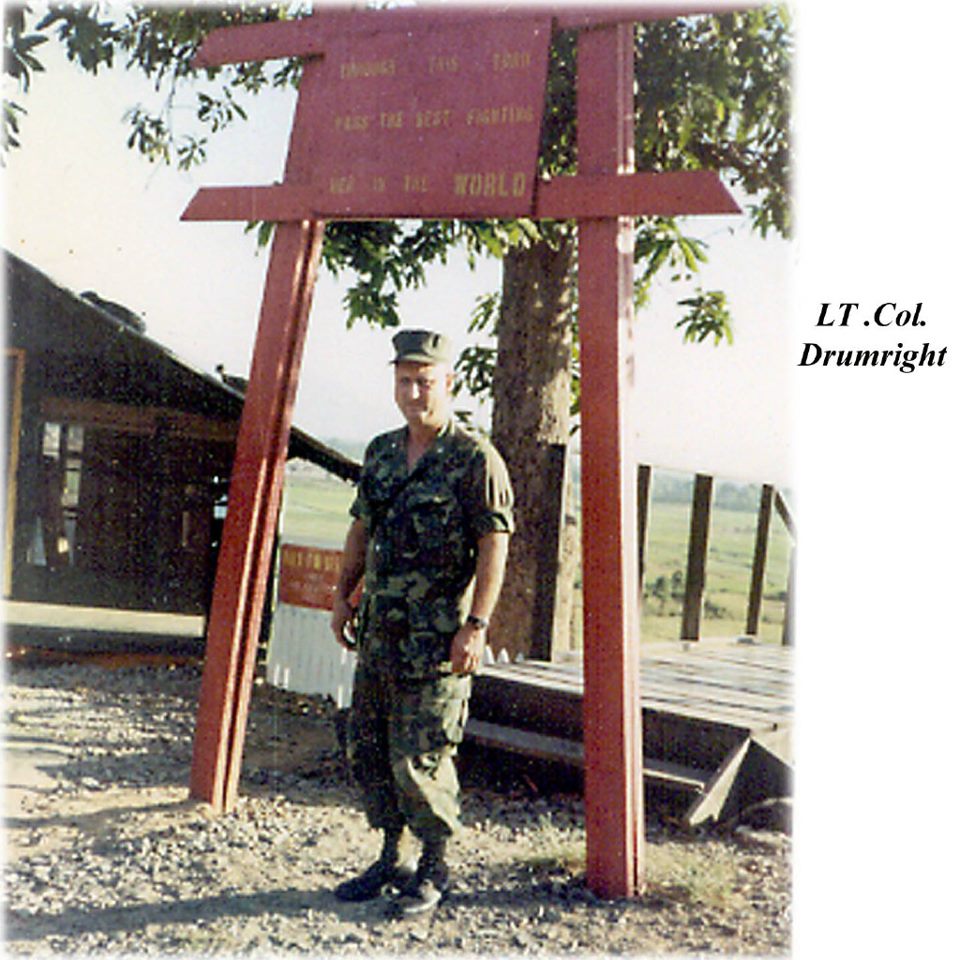
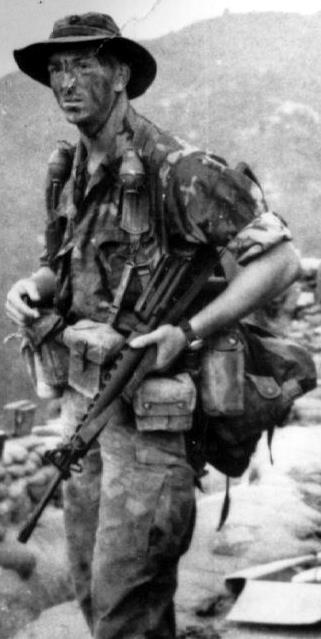
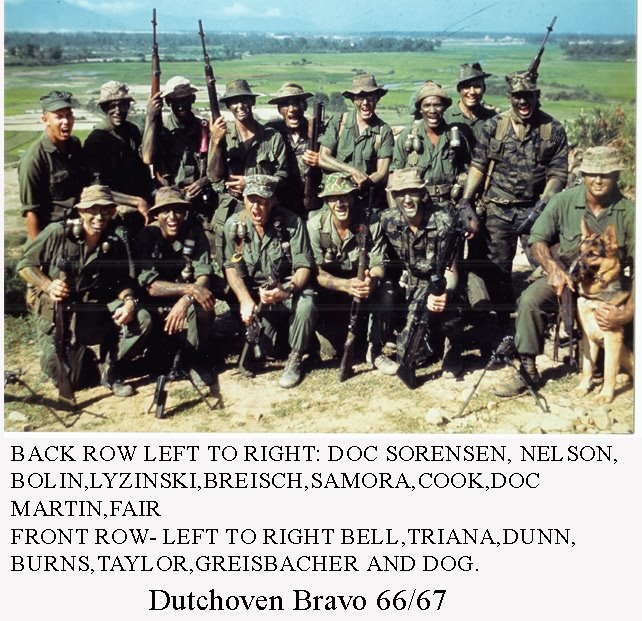

Photo from: John Paul
John Paul


1st Recon Bn Association
Follow Us:
© 1st Recon Bn Association | Privacy Policy
Copyright © 2024 All Rights Reserved.

Coming Soon